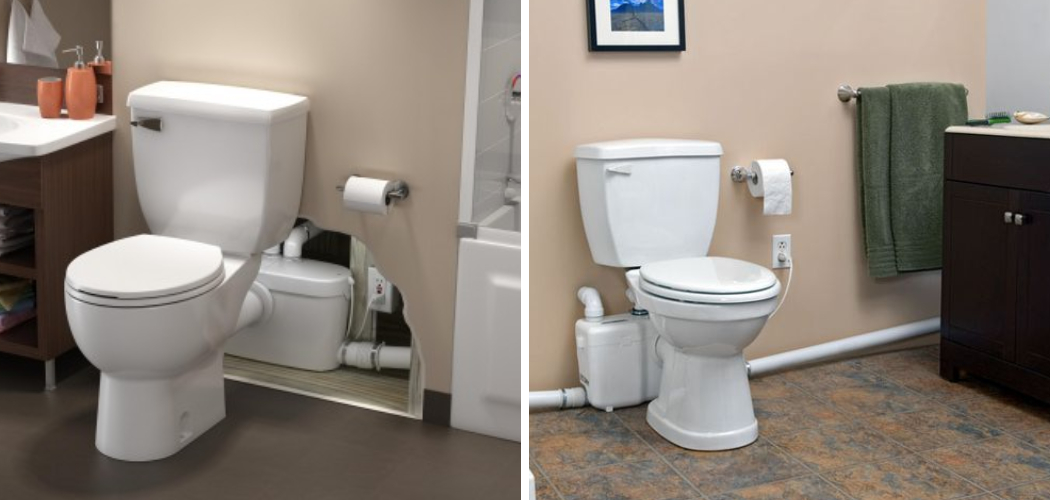
Saniflo toilets, known for their innovative macerating system, provide a versatile and efficient solution for bathroom installations in areas where traditional plumbing might not be feasible. These units use a macerator and a pump to grind and evacuate waste, allowing for installation below the sewer line or far from the main waste pipe. This feature is especially beneficial in basements, loft conversions, and any space where conventional plumbing poses a challenge.
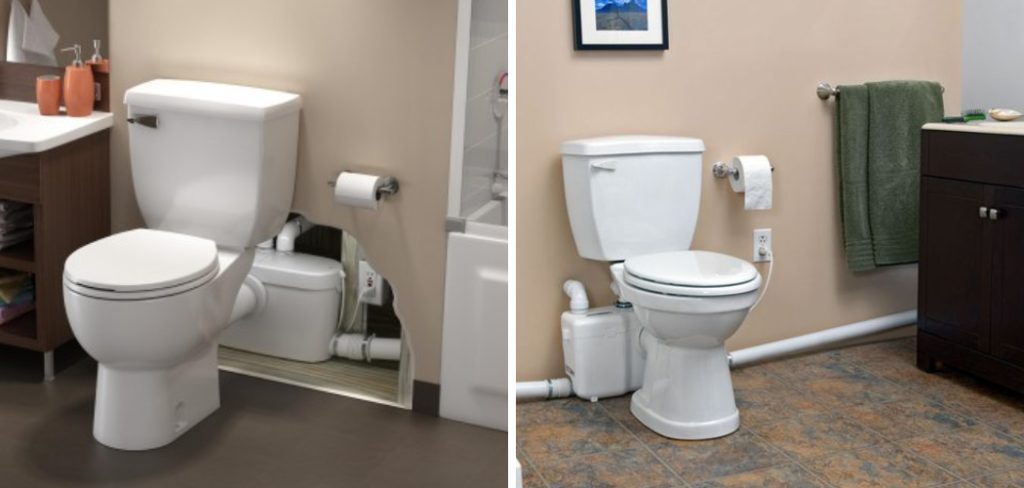
Understanding how to install a Saniflo toilet correctly is crucial for ensuring its functionality and performance. Proper installation guarantees efficient waste management and extends the unit’s lifespan, preventing common issues such as leaks or backflow, which could lead to significant inconvenience and expense.
The process of installing a Saniflo toilet involves several steps, from pre-installation preparation, including gathering the necessary tools and understanding the system’s components, to the final inspection and testing. This guide aims to provide a comprehensive step-by-step overview to help you successfully complete your how to install a Saniflo toilet project, ensuring a smooth and efficient operation of your new system.
Pre-Installation Preparation
Before commencing with installing your Saniflo toilet, it is imperative to meticulously prepare to ensure a streamlined and error-free process. This phase lays the groundwork for a successful installation, avoiding potential setbacks or complications.
A. Gather Necessary Tools and Materials
Start by assembling all the necessary tools and materials for the installation. This comprehensive list should include a Phillips and flat-head screwdriver, adjustable wrenches, pliers, a drill with various drill bits, silicone sealant, PVC pipework, connectors, and the Saniflo unit itself. Additionally, ensure you have safety equipment such as gloves and goggles to protect yourself during installation.
B. Read and Understand the Saniflo Toilet Installation Manual
Thoroughly reading and understanding the Saniflo toilet installation manual cannot be overstated. Each model may come with its specific installations quirks or requirements, and familiarity with these instructions ensures you are well-prepared for the task ahead. This step familiarizes you with the components you’ll work with and provides crucial information on the proper configurations, alignments, and troubleshooting tips.
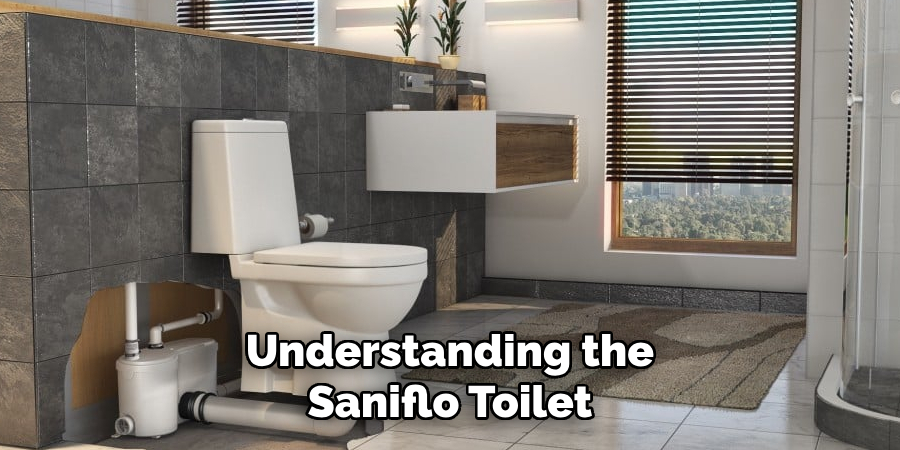
C. Ensure Proper Placement and Accessibility of Plumbing Connections
Before proceeding with the physical installation, determine your space’s most suitable location for the Saniflo system. Consider accessibility for maintenance and the proximity to existing plumbing connections.
The site should allow for easy connection to the home’s water supply and waste system while complying with local building codes and regulations. Proper positioning is essential to maximize the efficiency of the macerating system and facilitate a smooth flow of waste away from the fixture.
Install the Saniflo Macerator Unit
Installing the Saniflo macerator unit is pivotal in setting up your new toilet system. Proper installation ensures efficient operation and prevents potential issues. Follow these steps to correctly install the macerator unit.
A. Select a Suitable Location for the Macerator Unit
Selecting the optimal location for your Saniflo macerator unit is crucial. It should be easily accessible for maintenance and near the toilet for easy connection. Ensure the location also allows for connection to the existing waste and water lines.
The space must accommodate the unit’s dimensions and provide enough room for the inlet and outlet pipes. Consider also the unit’s proximity to an electrical outlet, as it requires power to operate.
B. Secure the Macerator Unit to the Floor or Wall Mount
Once the optimal location is identified, mount the macerator unit either to the floor or the wall, depending on your specific model and spatial constraints. If mounting to the floor, ensure the unit is leveled to prevent operational issues.
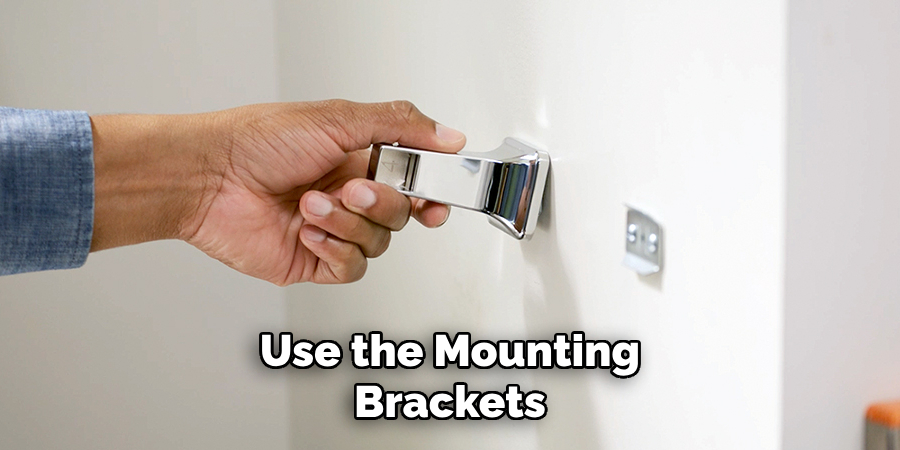
For wall-mounted units, use the mounting brackets provided and secure them into studs to support the unit’s weight. Follow the manufacturer’s guidelines for securing the unit to ensure it is firmly in place.
C. Connect the Inlet and Outlet Pipes to the Macerator Unit
The next step involves connecting the toilet’s inlet pipes and other sanitary fixtures to the macerator unit. Ensure the pipes fit snugly and seal any connections with PVC cement to prevent leaks.
For the outlet pipe, ensure it’s directed towards the sewer line, maintaining a slope as recommended by the manufacturer for efficient waste removal. Use non-return valves as necessary to prevent backflow. Check all connections for tightness and ensure they comply with local plumbing codes.
Connect the Toilet Bowl
Connecting the toilet bowl to the Saniflo macerator unit is critical to completing your installation. Following these detailed instructions will ensure a secure and efficient setup.
A. Position the Toilet Bowl Over the Macerator Unit
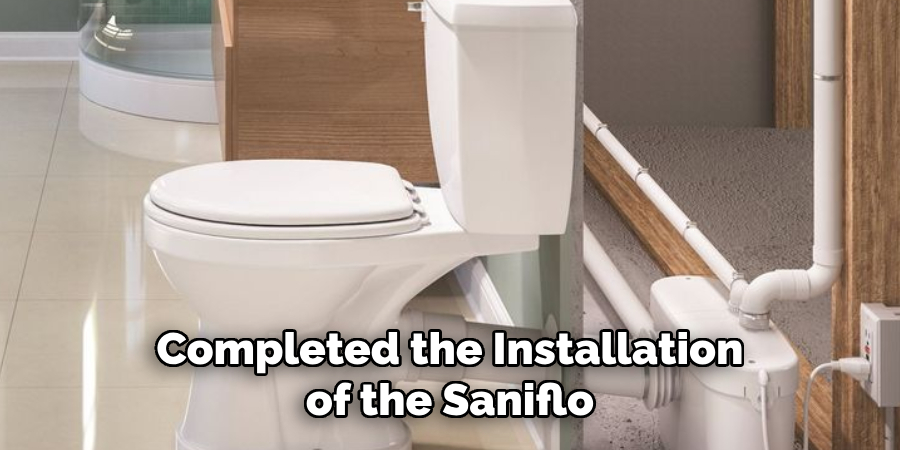
Begin by carefully positioning the toilet bowl directly over the macerator unit’s inlet connection. It’s essential to align the outlet hole of the toilet with the inlet of the macerator to guarantee a seamless connection. Check to ensure that the toilet is positioned correctly and is level with the floor to prevent any operational issues.
B. Secure the Toilet Bowl to the Floor with Anchor Bolts
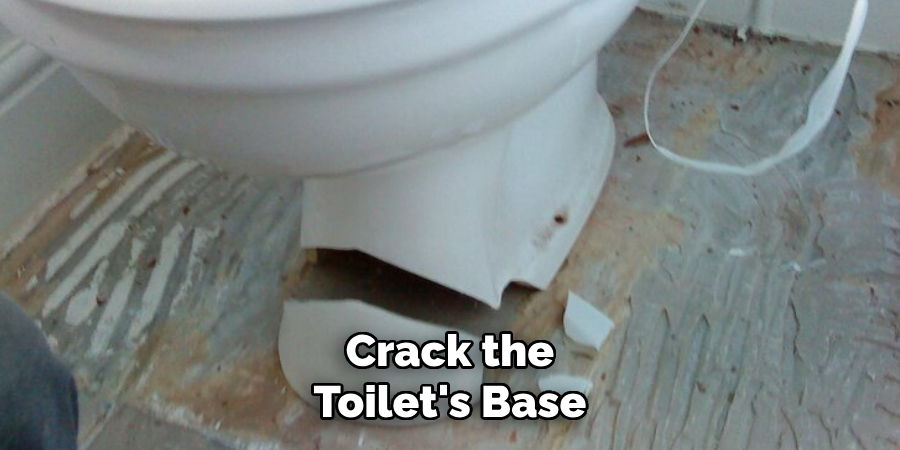
Once the toilet bowl is correctly positioned, use anchor bolts to secure it firmly to the floor. This step is crucial to prevent any movement that could disrupt the waste pipe connections or damage the macerator unit. Drill pilot holes into the floor at the designated spots under the toilet’s base, then tightly screw the anchor bolts into place. Be careful not to over-tighten and crack the toilet’s base.
C. Connect the Waste Pipe from the Toilet Bowl to the Macerator Unit
Finally, the waste pipe from the toilet bowl is connected to the macerator unit. This connection is vital for directing the waste into the macerator for processing. Ensure the pipe is of the appropriate diameter as specified by the manufacturer and fits securely between the toilet and the macerator.
A rubber coupling is used to connect the pipe to the macerator inlet, tightening the clamps to ensure a leak-proof seal. Double-check all connections to ensure they are tight and correctly aligned, as this will prevent future leaks or operational issues.
Following these instructions for connecting the toilet bowl to the Saniflo macerator unit will ensure that your installation is secure, reliable, and ready for use.
How to Install a Saniflo Toilet: Install the Saniflo Tank and Pump
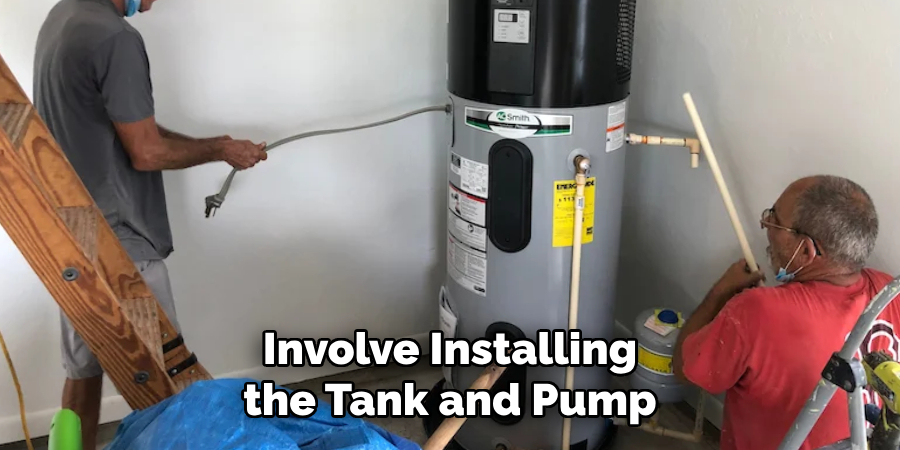
The final steps in setting up your Saniflo system involve installing the tank and pump. These components are crucial for the efficient operation of your entire system. Follow these steps to ensure a correct and safe installation.
A. Mount the Saniflo Tank on the Wall Behind the Toilet Bowl
The Saniflo tank, which collects and holds waste before it is pumped away, should be mounted on the wall directly behind the toilet bowl. This placement allows gravity to assist in the waste movement from the bowl to the tank.
Use heavy-duty wall anchors and mounting brackets provided by the manufacturer to secure the tank at the recommended height. Ensure that the tank is level to prevent operational issues and positioned within easy maintenance reach.
B. Connect the Pump Outlet Pipe to the Saniflo Tank
Once the Saniflo tank is securely mounted, the next step is to connect the pump outlet pipe. This pipe is responsible for transporting the macerated waste from the tank to your home’s main sewage line.
Ensure that the outlet pipe is correctly connected to the pump’s discharge port and that it runs to the Saniflo tank without any kinks or severe bends that could impede flow. Secure all connections with clamps and check for leaks to ensure a seamless waste transfer.
C. Ensure Proper Electrical Wiring for the Pump
The pump is an electrically powered component of the Saniflo system, making correct and safe wiring a paramount concern. Follow the manufacturer’s instructions closely to connect the pump to your home’s electrical supply, ensuring compliance with local electrical codes.
Use a dedicated circuit if required, and consider installing a Ground Fault Circuit Interrupter (GFCI) for additional safety. It’s advisable to have the electrical connections inspected by a licensed electrician to guarantee that the installation meets all safety standards.
Test the System
Once you have completed the installation of the Saniflo unit, it is crucial to test the system thoroughly to ensure everything operates as it should.
A. Fill the Saniflo Tank with Water
Begin by manually filling the Saniflo tank with water until it reaches the normal operating level. This initial fill is essential to prime and prepare the system for its first use. Ensure that the water level does not exceed the maximum fill line to avoid any potential overflow issues.
B. Flush the Toilet and Observe Proper Functionality
Next, test the toilet flush to examine the system’s functionality. Observe the process closely, from flushing the toilet to activating the macerator and pump. The system should engage smoothly, with the macerator grinding the waste and the pump efficiently moving it into the sewer line. Pay attention to any delays or unusual noises, as these could indicate problems or maladjustments in the system.
C. Check for Leaks or Any Issues with Pump Operation
Finally, all connections and the Saniflo tank should be inspected for leaks. Even minor leaks can lead to significant issues over time, so it’s critical to address them immediately. Listen to the pump during operation to ensure it sounds consistent and doesn’t exhibit signs of straining or blockages. If you encounter any leaks or operational issues, refer to the installation instructions to make the necessary adjustments or consult a professional for more complex problems.
By following these testing steps, you can confidently verify that your Saniflo system is installed correctly and ready for regular use. Regular maintenance checks are recommended to keep the system operating efficiently.

Final Adjustments and Sealants
After thoroughly testing the system and ensuring that all components operate correctly, a few final adjustments and sealant application are necessary to complete the installation process.
A. Apply Sealant Around the Base of the Toilet Bowl
Once you are satisfied with the installation and have confirmed there are no leaks, apply a waterproof sealant around the base of the toilet bowl where it meets the floor. This sealant not only helps to secure the toilet in place but also prevents water from seeping under the base, which can cause damage over time. Be sure to apply the sealant evenly and wipe away any excess for a clean finish.
B. Adjust the Toilet Seat and Lid for Proper Fit
Before the installation is considered complete, ensure that the toilet seat and lid are properly adjusted and securely attached to the bowl. This may require tightening the screws that hold the seat in place to prevent it from shifting or wobbling during use. Proper alignment of the seat and lid enhances the toilet’s aesthetic appeal and ensures its functional integrity.
C. Clean Up Any Excess Sealant or Debris
The final step involves cleaning up the installation area. Remove any excess sealant before it fully dries to avoid difficulty later on. Additionally, clear away any debris or tools that were used during the installation process. Leaving the bathroom clean and tidy not only marks the completion of the project but also allows you to immediately begin enjoying the benefits of your new Saniflo system.
By carefully following these final steps for adjustments and sealants, you ensure a polished and professional finish to your Saniflo system installation. Regular maintenance and mindful usage will keep your new toilet system running efficiently for years to come.
Electrical Connection (If Applicable)
If your Saniflo system requires an electrical connection, it is crucial to prioritize safety and compliance with all regulations. Here are the steps to properly connect your Saniflo pump to the electrical supply:
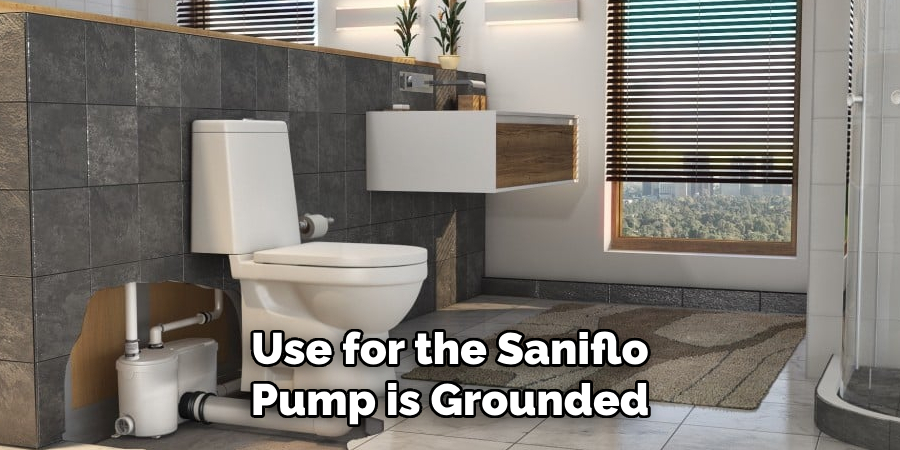
A. Connect the Pump to a Grounded Electrical Outlet
Ensure that the electrical outlet you plan to use for the Saniflo pump is grounded. This is essential for protecting the system against electrical surges and preventing potential electric shock hazards. It is advisable to use a dedicated outlet for the pump to avoid overloading and ensure a consistent power supply. Confirm that the outlet’s voltage matches the pump’s requirements for optimal performance.
B. Follow Manufacturer Instructions for Electrical Wiring
For the electrical wiring, closely follow the manufacturer’s instructions for your Saniflo unit. These instructions are designed to guide you through safely connecting the pump to your home’s electrical system.
Miswiring can lead to system malfunction or pose serious safety risks, so if you are not confident in your electrical skills, it is strongly recommended that you hire a licensed electrician for this step.
C. Ensure Compliance with Electrical Codes and Regulations
Lastly, ensuring that all electrical connections and installations comply with local electrical codes and safety regulations is paramount. These codes are established to ensure safety and prevent accidents related to electrical installations. It may necessitate having a professional inspection of the installation to certify compliance. Ignoring these regulations can result in penalties and compromise the safety of your household.
By meticulously following these electrical connection guidelines, you will ensure that your Saniflo system is set up for optimal functionality and upholds the highest safety standards.
Final Inspection and Testing
Completing the Saniflo system installation is not the end of the process. A final inspection and multiple tests are critical to ensure everything functions correctly and safely. This step is essential for catching any potential issues before the system is used regularly.
A. Conduct a Visual Inspection of All Connections and Components
Begin by conducting a thorough visual inspection of all connections and components of the Saniflo system. Check for proper alignment and secure fittings and ensure there are no gaps or loose parts.
This includes revisiting the connections between the toilet and the macerator, the macerator and the pump, and finally, the pump to the sewer line. Confirm that all electrical connections, if applicable, are correctly and safely installed. A meticulous visual check helps spot any oversight that might have occurred during the installation.
B. Test the Toilet System Multiple Times to Ensure Proper Functionality
After the visual inspection, proceed to test the toilet system multiple times. This repeated testing is crucial for evaluating the system’s consistency in performance. Flush the toilet several times to monitor how the system manages waste and water flow. Observe the macerator and pump’s response to ensure they operate as expected without delays or unusual noises. These tests help verify the system’s reliability under normal use conditions.
C. Address Any Issues or Concerns Promptly
Should any issues or concerns arise during the final inspection or testing phase, it is vital to address them promptly. Whether it’s a leak, a noisy pump, or a flaw in electrical connections, immediate action is necessary to rectify the problem. If the issue is beyond personal rectification capabilities, do not hesitate to consult with or hire a professional. Ensuring all components function correctly before regular use begins will save time, expense, and inconvenience in the future.
Maintenance and Care Tips
A. Regularly Clean and Maintain the Saniflo System
Establishing a routine maintenance schedule is crucial to ensuring the longevity and efficiency of your Saniflo system. Regularly cleaning your system can prevent build-ups that may clog or damage the macerator and pump.
Use mild cleaning agents recommended by the manufacturer to avoid damaging the components. Wipe down the exterior of the toilet and the accessible parts of the system without disassembling it, ensuring it remains clean and hygienic.

B. Avoid Flushing Non-Biodegradable Items or Harsh Chemicals
One of the most important care tips for maintaining your Saniflo system’s optimal functionality is to be mindful of what you flush. Non-biodegradable items such as baby wipes, sanitary products, and even certain types of toilet paper can cause significant blockages and damage.
Also, avoid using bleach or harsh chemicals that might corrode the system’s internal parts. Sticking to human waste and toilet paper is the safest practice to prevent any potential issues.
C. Schedule Regular Inspections and Maintenance Checks
Beyond daily and weekly maintenance routines, scheduling regular inspections and maintenance checks with a professional can detect potential issues before they escalate. Ideally done annually, these checks will ensure that all parts of the Saniflo system function correctly and efficiently.
A professional can also advise on any necessary repairs or replacements, guaranteeing that the system remains in top condition over the years. Adhering to these maintenance and care tips will extend the life of your Saniflo system and ensure it continues to run smoothly.
Conclusion
The process of how to install a Saniflo toilet encompasses several meticulous steps designed to ensure the system’s optimal functionality and safety. From preparing the installation area, connecting the toilet and macerator, to establishing electrical connections and ensuring compliance with local codes, each phase is pivotal. The final inspection and testing and regular maintenance solidify the system’s reliability.
Understanding and executing each step in the Saniflo toilet installation guide is crucial for securing long-term performance and efficiency. Proper installation guarantees the system’s functionality and minimizes the risk of future problems, reassuring homeowners of a reliable and sustainable investment in their Saniflo system.
We hope this guide illuminates the path on how to install a Saniflo toilet, making your installation project smooth and successful. Remember, precisely following each outlined step is key to unlocking the system’s full potential. We wish you the best of success in your Saniflo toilet installation project, and we are confident that it will enhance your home’s facilities while providing lasting satisfaction.

