Replacing a worn-out washer in a bathroom faucet is a straightforward task that can save you both time and money by avoiding the need for professional repairs. Washers are essential components that help prevent leaks, and over time, they may wear out due to constant use. With just a few basic tools and a little patience, you can fix the issue and restore your faucet to full functionality. This guide will walk you through how to change a washer in a bathroom faucet.

What is a Washer in Plumbing?
A washer in plumbing is a small, flat, and typically circular component made from materials such as rubber, plastic, or metal. It is designed to create a watertight seal between two surfaces, helping to prevent leaks in fixtures such as faucets, valves, and pipes. Washers are commonly found in compression-style faucets, where they press against a valve seat to stop the flow of water when the faucet is turned off.
Over time, washers can deteriorate due to wear and tear, mineral deposits, or constant water pressure, making them a frequent culprit behind dripping faucets and leaks.
Types of Washers Used in Faucets
When it comes to faucet washers, there are several types commonly used, each suited for specific applications and faucet designs. Understanding the different types of washers can help you select the most appropriate one for your repair:
- Rubber Washers – Rubber washers are the most commonly used type in compression-style faucets. They provide flexibility and durability, which makes them effective at creating a watertight seal. However, rubber washers can degrade or harden over time due to constant exposure to water pressure and temperature variations.
- Silicone Washers – Silicone washers are similar to rubber but offer greater resistance to high temperatures and harsh chemicals. These are ideal for hot water faucets or areas with exposure to aggressive cleaning agents, making them a more durable option.
- Nylon Washers – Nylon washers are lightweight and resistant to wear and friction. They are commonly used in modern faucets due to their strength and ability to handle repetitive use without degrading quickly.
- Brass or Metal Washers – Metal washers, such as brass, are sturdier and long-lasting. These are typically used in heavy-duty or industrial applications. While durable, they may not provide the same flexibility as rubber or silicone washers, and over-tightening can sometimes lead to damage.
- Fiber Washers – Fiber washers are made from compressed materials like resin or vulcanized fiber. They are often used in faucets with unique design needs and are known for their high-pressure sealing and resistance to leaks.
By identifying the type of washer in your faucet, you can ensure a proper fit and a longer-lasting repair for your plumbing fixture.
Tools and Materials Needed
Before you begin replacing the washer in your bathroom faucet, gather the following tools and materials to ensure the process goes smoothly:
- Adjustable Wrench or Spanner – To remove nuts and bolts securing the faucet parts.
- Screwdrivers (Flathead and Phillips) – For unscrewing handles or screws holding the faucet assembly.
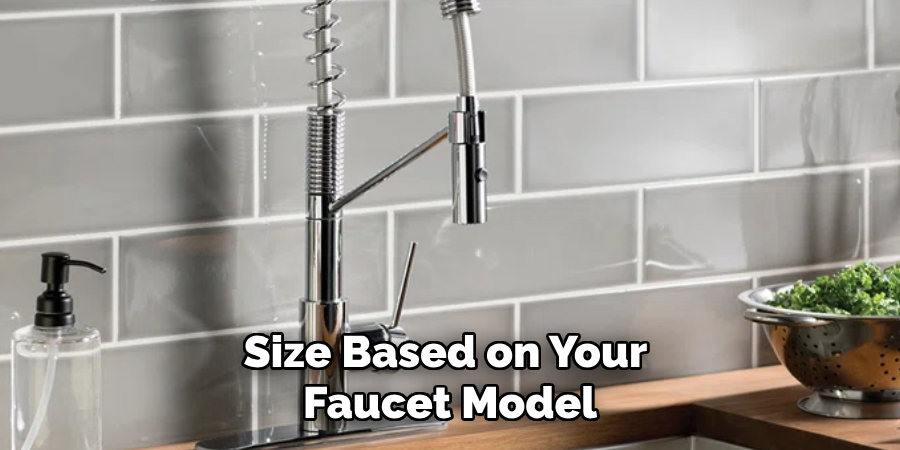
- Replacement Washer – Choose the correct type and size based on your faucet model.
- Plumber’s Tape (Teflon Tape) – To seal any threaded connections and prevent leaks.
- Utility Knife – For cleaning away old plumber’s tape or debris.
- Pliers – Useful for gripping or loosening hard-to-reach parts.
- Bucket or Towel – To catch any water that may spill during the repair.
- Cleaning Cloth or Sponge – To clean around the faucet area and remove any debris.
- Lubricant (Optional) – Non-corrosive lubricant for easing tight fittings or ensuring smoother operation of parts.

With these tools and materials ready, you will be well-prepared to efficiently replace the washer and restore your faucet’s functionality.
10 Methods How to Change a Washer in a Bathroom Faucet
1. Gather the Necessary Tools
Before starting, ensure you have all the tools required for the job. Common items include an adjustable wrench, a screwdriver (flat-head or Phillips, depending on your faucet), plumber’s tape, and replacement washers. Having everything ready will make the process smoother and prevent interruptions.
2. Turn Off the Water Supply
To avoid water spillage, turn off the water supply to the faucet. Locate the shut-off valves beneath the sink and turn them clockwise until they’re fully closed. If your sink doesn’t have individual shut-off valves, you may need to turn off the main water supply for your home. Open the faucet to release any remaining water pressure.
3. Plug the Drain
Before disassembling the faucet, plug the sink drain with a stopper or cloth. This step prevents small parts like screws or washers from falling into the drain, making the task easier and less stressful.
4. Remove the Faucet Handle
The faucet handle must be removed to access the washer. Locate the screw that secures the handle, which is often hidden beneath a decorative cap. Use a flat-head screwdriver to gently pry off the cap, then remove the screw with the appropriate screwdriver. Carefully lift the handle off the faucet stem.
5. Access the Valve Stem
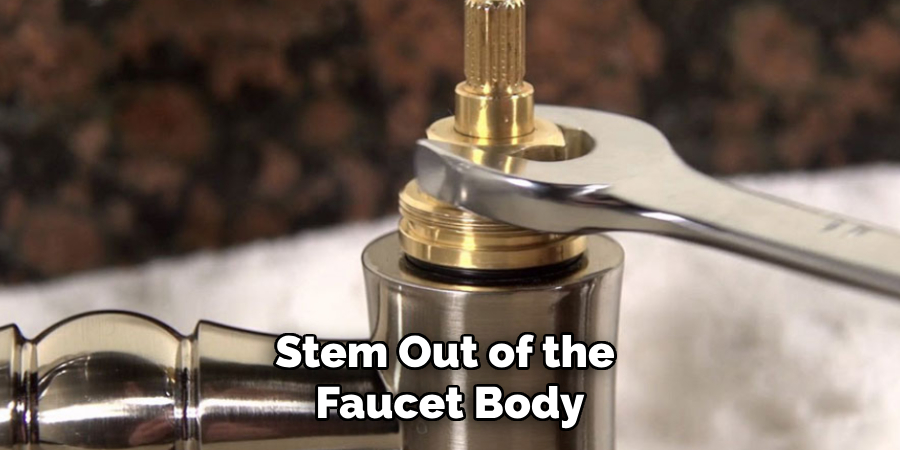
With the handle removed, you’ll see the valve stem that controls the flow of water. Use an adjustable wrench or pliers to unscrew the packing nut that holds the stem in place. Once the nut is removed, pull the stem out of the faucet body. Keep track of all components as you disassemble them.
6. Identify the Washer

At the base of the valve stem, you’ll find the washer secured by a small screw. Inspect the washer to determine if it’s worn, cracked, or hardened. These signs indicate the need for replacement. Note the size and type of the washer to ensure you purchase the correct replacement.
7. Replace the Washer
Unscrew the washer from the valve stem using a screwdriver. Attach the new washer by securing it with the screw. Ensure the washer sits snugly and is not too loose or overly tight. Using the correct washer size is essential for a proper seal and effective faucet operation.
8. Reassemble the Faucet
Once the new washer is in place, reinsert the valve stem into the faucet body. Tighten the packing nut with your wrench, ensuring it’s secure but not overtightened. Reattach the faucet handle by aligning it with the stem, inserting the screw, and tightening it. Replace the decorative cap if applicable.
9. Turn On the Water Supply
Restore the water supply by turning the shut-off valves under the sink counterclockwise. Slowly open the faucet to test its operation. Check for leaks around the handle or spout. If you notice any issues, double-check the assembly and ensure all components are tightened properly.
10. Test and Maintain the Faucet
After confirming that the faucet operates smoothly and without leaks, take a moment to clean the area around it. Regular maintenance, such as cleaning the aerator and checking for wear, can extend the life of your faucet and prevent future issues. Keep spare washers on hand for quick repairs.

Things to Consider When Replacing a Washer in a Bathroom Faucet
- Identify the Correct Washer Type and Size
Before purchasing a replacement washer, ensure you understand the specifications required for your faucet. Using the wrong type or size can lead to improper sealing and further leaks. Refer to your faucet’s manual or bring the old washer to the hardware store for comparison.
- Inspect the Faucet Components
While disassembling the faucet, take time to inspect the other parts, such as the valve stem, O-rings, and packing nut, for wear or damage. Replacing multiple worn parts during this process can save time and prevent additional repairs later.
- Be Gentle with Older Fixtures
Faucets that have been in use for a long time may have delicate or corroded parts. Use caution to avoid overtightening or forcing components, which could damage the fixture and complicate the repair process.
- Turn Off the Main Water Supply if Necessary
If your bathroom sink lacks individual shut-off valves, turn off the main water supply for your home. This ensures that no water flows while you work and prevents unexpected flooding.
- Prepare for Possible Challenges
Older washers may be stuck due to mineral buildup or corrosion. Using a lubricant or a gentle tool to loosen the components can make the task easier. Always have a backup plan or additional tools, such as pliers or a utility knife, for persistent issues.
- Test Thoroughly After the Repair
Once the repair is complete, run the faucet and check for leaks. Observe the water flow and ensure there are no drips around the handle, spout, or base. Proper testing guarantees a successful fix and minimizes the chance of future complications.

Conclusion
Replacing a washer in a bathroom faucet is a straightforward process that can save you time and money compared to hiring a professional. By following the steps outlined above and taking the necessary precautions, you can restore your faucet’s functionality and prevent leaks effectively. Remember to use the correct tools, inspect all components, and test the faucet thoroughly after reassembly.
Thanks for reading our blog post on how to change a washer in a bathroom faucet! We hope you found it helpful and informative.

