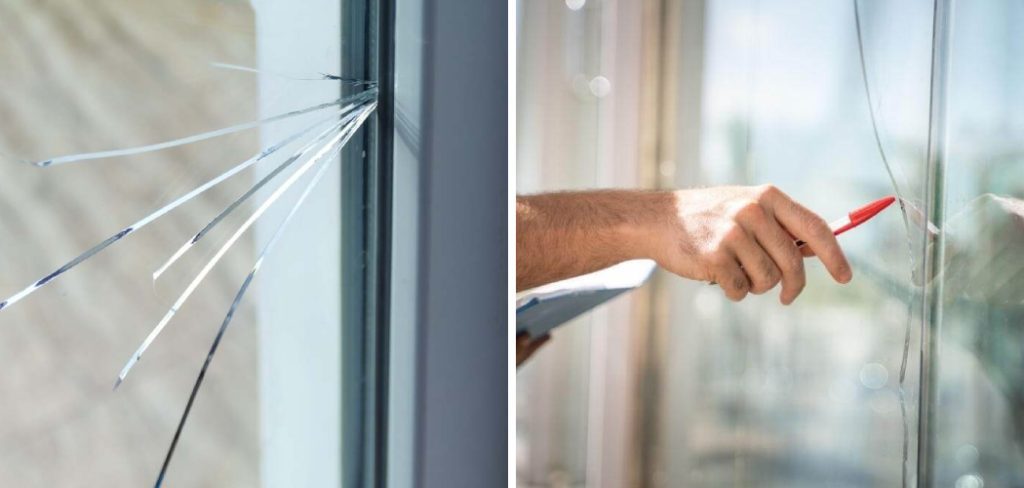
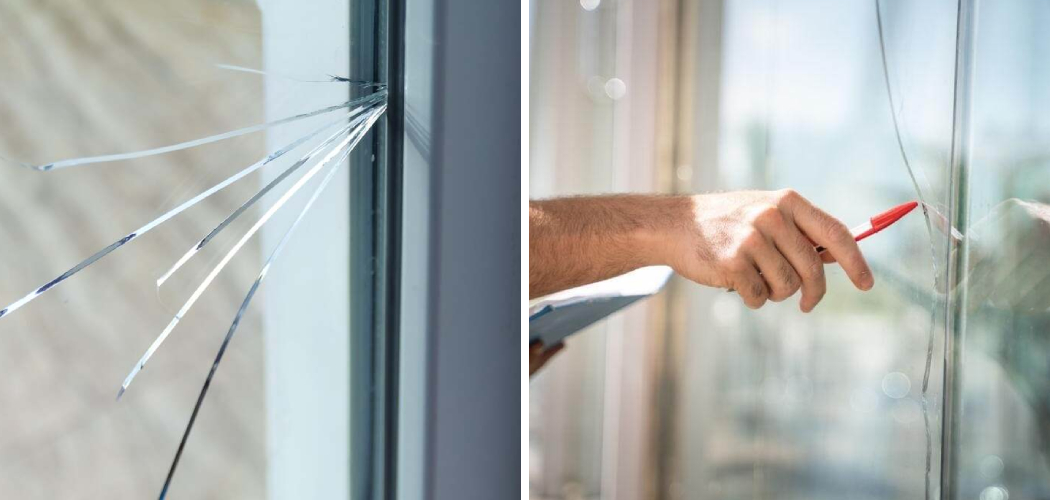
Bathroom window cracks are a common issue that can arise due to various factors such as sudden temperature changes, accidental impacts, or even aging materials. These cracks diminish the aesthetic appeal of your bathroom, can compromise privacy, and lead to moisture intrusion if left unaddressed. Over time, even small cracks can worsen, potentially causing higher repair expenses or requiring a full window replacement.
Addressing this problem promptly is crucial to maintaining your window’s functionality and structural integrity.

Regarding solutions, several repair methods are available based on the severity of the crack. Minor cracks may be addressed with simple DIY techniques, while extensive damage might require professional expertise. Knowing how to repair a cracked bathroom window ensures you can select the most effective option for your needs and prevent further damage, keeping your bathroom safe, comfortable, and visually appealing.
Assessing the Crack
Before initiating repairs, assessing the crack in your bathroom window is essential to understand its severity and the appropriate course of action. A thorough evaluation will ensure that you choose the right solution, whether it’s a simple DIY fix or a complete replacement.
Types of Cracks
There are generally three main types of cracks you may encounter. Surface cracks are minor and often superficial, posing no immediate structural threat if addressed promptly. Hairline fractures are slightly deeper, thin cracks that could spread over time if left untreated. Larger structural cracks, on the other hand, are significant and may compromise the integrity of the window, often necessitating professional replacement.
Extent of Damage
To determine whether the crack is repairable or requires a full replacement, evaluate its location and size. Cracks near the edges or spanning the entire pane are more challenging to repair and might demand a replacement, while smaller or central cracks are often manageable with repair kits.
Tools for Inspection
Inspecting the window crack properly means using the right tools. A magnifying glass can help detect tiny fractures, a flashlight can illuminate hard-to-see areas, and a ruler allows you to measure the length and width of the crack accurately. These tools will clarify the damage’s severity and guide your next steps effectively.
Tools and Materials Needed
Essential Tools
To effectively address window cracks, you will need a few key tools. Start with a glass cleaner to remove dirt and debris from the surface, ensuring a clean repair area. Masking tape is useful for marking the edges of the crack or holding temporary materials in place. A utility knife can help scrape away loose glass or smooth surfaces, while a glass repair kit provides the specialized tools needed for a professional-grade repair.
Materials for Repair
For the repair itself, epoxy resin and acrylic adhesive are two of the most reliable solutions for sealing cracks and restoring strength. Alternatively, clear nail polish can be used for minor cracks as a temporary fix until a more permanent repair is possible.

Optional Supplies
Safety gloves and goggles are highly recommended to protect your hands and eyes during repair, especially when working with sharp glass edges or chemical adhesives.
How to Repair a Cracked Bathroom Window: Temporary Fixes for Immediate Protection
When dealing with window cracks, temporary fixes can provide immediate protection until a permanent solution is applied. Here are some practical methods:
Using Clear Tape
Start by cleaning the cracked area with a glass cleaner to remove dust and debris, allowing the tape to adhere smoothly. Cut small strips of clear tape and carefully cover the length of the crack on both sides of the glass for added stability. This can prevent the crack from spreading further and offer some structural support. Ensure the tape is applied securely and without air bubbles for the best results.
Nail Polish or Glue
For smaller cracks, clear nail polish or a strong adhesive like super glue can serve as a quick sealant. Apply a thin layer of the polish or glue along the length of the crack, ensuring complete coverage. Allow it to dry thoroughly, temporarily sealing the crack and preventing moisture from seeping in. These materials are best suited for minor damage and should not replace professional repairs.
Plastic Sheet Covering
To create a temporary waterproof barrier, use a plastic sheet that is slightly larger than the cracked area. Tape the plastic edges securely to the window frame using masking tape or duct tape, covering the damaged section completely. This method can block wind and rain, providing immediate protection while awaiting more extensive repairs.
How to Repair a Cracked Bathroom Window: Permanent Repair for Small Cracks
Cleaning the Area
Before beginning the repair process, thoroughly clean the damaged area of the glass using a non-abrasive glass cleaner. This step is crucial to remove dirt, dust, and any loose particles that may interfere with the adhesive bonding. Gently wipe the surface with a microfiber cloth or a soft, lint-free material to avoid scratching the glass further. After cleaning, ensure the area is completely dry, as moisture can weaken the adhesive’s effectiveness and compromise the repair.

Applying Epoxy or Adhesive
To fill the crack, you will need a high-quality glass adhesive or epoxy resin and a syringe or applicator for precise application. Prepare the adhesive according to the manufacturer’s instructions, as some products may require mixing. Next, carefully inject or apply the adhesive directly into the crack, ensuring it fills the entire length and depth of the damage.
Use a steady hand during application to avoid trapping air bubbles, which could reduce the repair’s integrity. Wipe away any excess adhesive promptly with a clean cloth to prevent it from hardening on the surface.
Curing and Polishing
Allow the adhesive to cure completely based on the product guidelines, which typically recommend several hours or overnight. Avoid handling or placing pressure on the repaired area during this time to ensure optimal bonding. Once the adhesive has fully hardened, inspect the repaired surface for a seamless finish. If needed, use a fine-grade polishing compound to buff the area gently.
Polishing will help restore the glass’s clarity and smoothness, making the crack less visible and producing a professional-quality repair. This permanent method can effectively strengthen the glass and extend its lifespan with proper care.
Replacing a Broken Window Pane
When Replacement is Necessary
Replacing a window pane becomes essential when the damage is too severe for repairs to be effective. Cracks longer than 12 inches or those reaching the edge of the glass compromise the structural integrity and safety of the window. These types of damage cannot be reliably fixed, making replacement the best option to ensure durability and functionality.
Additionally, completely shattered glass should be immediately replaced to restore the security and efficiency of the window.
Removing the Damaged Pane
Before removing the damaged glass, wear protective gloves and goggles to safeguard against potential cuts or injuries. Begin by carefully removing the frame or window sash, depending on the window design, and placing it on a flat surface. Use a utility knife to loosen any remaining sealant or putty around the edges. If clips or glazing points hold the glass in place, gently pry them loose with a putty knife or screwdriver.
Once the glass is freed, carefully lift it out of the frame, disposing of it safely according to local guidelines for broken glass.

Installing the New Glass
To install the replacement pane, accurately measure the frame’s opening, allowing for a slight gap to accommodate thermal expansion. Have the replacement glass cut to size at a glass shop, or purchase a pre-cut pane if available. Insert the new glass into the frame, ensuring it fits snugly. Use glazing points or clips to secure it in place. Apply a uniform layer of glazing putty or caulk around the edges to create a tight seal.
Sealing and Finishing
For a weatherproof finish, apply a high-quality sealant around the perimeter of the frame to prevent air and water infiltration. Smooth the sealant with a putty knife for an even application. Allow the sealant to cure as per the manufacturer’s recommendations, and reinstall the frame or sash onto the window. Inspect the finished work to confirm the glass fits securely and operates smoothly.
A well-installed replacement pane ensures long-term durability, energy efficiency, and an appealing aesthetic.
Preventing Future Cracks
Preventing future cracks in your windows involves implementing proactive measures to enhance their durability and minimize environmental stress.
Temperature Control:
Fluctuating temperatures can lead to thermal stress, increasing the likelihood of cracks. To mitigate this, consider using window insulation films. These films help regulate the interior temperature of the glass, reducing the expansion and contraction caused by extreme heat or cold. This protects the window and improves energy efficiency in your home.

Protective Measures:
Installing tempered glass or window guards is another effective way to enhance resilience. Tempered glass is designed to withstand significant impact and thermal pressure, making it ideal for areas prone to harsh weather. Similarly, window guards can provide physical protection against accidental impacts, particularly useful in homes with children or high-traffic areas.
Regular Maintenance:
Routine inspections play a vital role in preventing long-term damage. Check for any loose frames or minor cracks during these inspections, as addressing small issues early can prevent them from becoming larger problems. Regularly applying a high-quality sealant can also reinforce the window’s integrity and protect against environmental elements.
By adopting these preventive practices, you can extend the lifespan of your windows and avoid the hassle and cost of frequent replacements.
Safety Tips During Repair
Protective Gear
When handling glass during repairs, wearing protective gear is essential. Always use sturdy gloves to prevent cuts from sharp edges and safety goggles to protect your eyes from flying shards or fragments. This ensures that you are shielded from potential injuries while working on glass-related fixes.
Handling Broken Glass
Properly disposing of broken glass is crucial to avoid accidents. Use a broom and dustpan to collect shards, and place them in a sturdy, puncture-resistant container before disposal. Label the container to warn others of the hazardous contents and ensure it is securely sealed.
Working with Adhesives
When using adhesives or sealants, ensure the workspace is well-ventilated to prevent inhaling harmful fumes. Follow the manufacturer’s instructions closely and wear a mask if recommended. These precautions will help maintain a safe environment during the repair process.

Conclusion
Addressing a cracked bathroom window promptly is essential to maintaining both functionality and aesthetics. Start by carefully assessing the crack’s size and severity to determine the appropriate repair method. DIY solutions are often effective for minor damage, while extensive cracks may require professional help. Preventing future damage involves regular inspections and addressing issues early.
Understanding “how to repair a cracked bathroom window” empowers homeowners to take proactive steps in preserving their windows. By following safety measures and choosing the right approach, you can ensure your bathroom window remains secure, appealing, and long-lasting.

