Are you tired of dealing with a bathtub drain that constantly comes loose? This is a common problem for many homeowners and can be frustrating.

A loose bathtub drain can lead to leaks, water damage, and reduced efficiency in draining water. Fortunately, tightening a loose drain is a straightforward process that requires only a few tools and minimal effort. Addressing this issue promptly can prevent further damage and ensure your bathtub functions appropriately. Additionally, this is a valuable skill that can save you from expensive plumbing repairs in the future.
This guide on how to tighten a loose bathtub drain will walk you through the steps to securely tighten a loose bathtub drain, even if you have little to no plumbing experience.
What Are the Benefits of Tightening a Loose Bathtub Drain?
Before diving into the process, let’s take a moment to understand why fixing a loose bathtub drain is important. A loose drain can cause several issues that negatively impact your overall bathing experience and household. Some of the benefits of tightening a loose bathtub drain include:
- Preventing Leaks: A loose drain can allow water to seep through, leading to potential water damage that can be costly to repair. You can stop leaks and keep your bathroom dry by tightening the drain.
- Improve Drainage Efficiency: When a bathtub drain is loose, it may not create an adequate seal between the tub and the drain pipe. This can result in slow drainage or standing water in the tub. Tightening the drain can improve drainage efficiency and ensure a smooth bathing experience.
- Avoid Future Plumbing Issues: If left untreated, a loose bathtub drain can cause significant damage to your plumbing system. This can lead to clogs, backups, and other costly repairs. By tightening the drain, you can avoid these issues and save yourself from expensive repairs in the future.
Now that we understand the importance of tightening a loose bathtub drain let’s get into how to do it!
What Will You Need?
To tighten a loose bathtub drain, you will need the following tools:
- Plumbers wrench: This tool is designed to grip pipes and fittings without damaging them. It can be purchased at most hardware or plumbing supply stores.
- Channel-lock pliers: These are adjustable pliers with serrated jaws that provide a strong grip on objects of various sizes. They can also be found at your local hardware store.
- Silicone caulk: This waterproof sealant creates a watertight bond between the tub and drain pipe after tightening the drain.
Now that we have all our tools ready let’s dive into the step-by-step process for tightening a loose bathtub drain.
10 Easy Steps on How to Tighten a Loose Bathtub Drain
Step 1. Remove the Drain Cover:
Start by locating the drain cover in your bathtub. Depending on the type of drain cover, you may need to use a screwdriver to remove screws holding it in place. For pop-up or lift-and-turn drain covers, gently twist and lift the cover to remove it. Be sure to place the drain cover and any screws or small parts in a safe place to avoid losing them during the process. Removing the drain cover will give you access to the drain pipe and allow you to inspect the area for any visible issues, such as buildup or corrosion, before proceeding to the next step.

Step 2. Clean the Drain Opening:
Once the drain cover has been removed, take a moment to clean the area around the drain opening. Use a brush or an old toothbrush to scrub away any debris, dirt, or grime that may have accumulated over time. You can apply a mild cleaning solution or vinegar to loosen it if there is stubborn buildup. Cleaning the drain opening ensures a better fit when tightening the drain and reduces the chances of future leaks. Make sure the area is dry before continuing to the next step.
Step 3. Inspect the Drain for Damage:
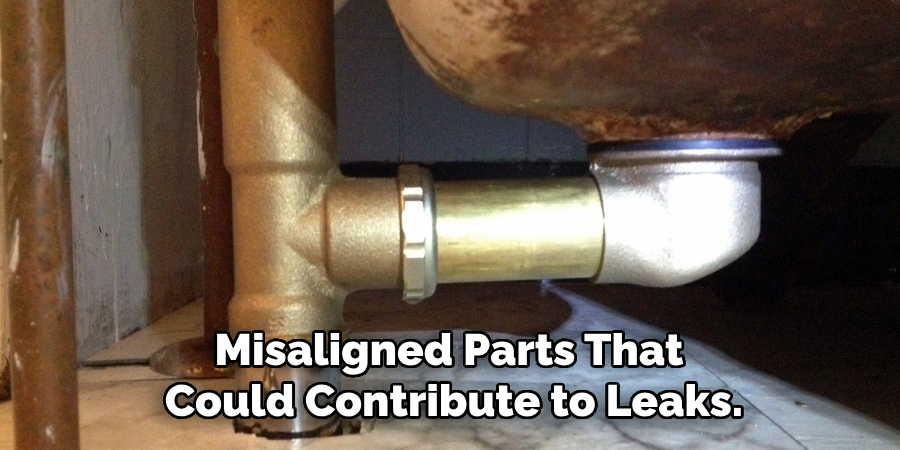
Carefully examine the drain pipe and surrounding components for any signs of damage or wear. Look for cracks, corrosion, or misaligned parts that could contribute to leaks. If you notice any issues, consider whether they can be repaired with sealant or if replacement parts are required. This inspection step is crucial for identifying underlying problems and ensuring the drain system functions properly after reassembly. Addressing damage at this stage prevents potential future complications.

Step 4. Apply Plumber’s Tape:
Before reassembling the drain, wrap the plumber’s tape around the threaded sections of the drain pipe. This tape helps create a watertight seal and prevents leaks once everything is tightened. Be sure to apply the tape evenly and wrap it around the threads at least two to three times for optimal coverage. Plumber’s tape is essential in reinforcing the integrity of the drain system and ensuring long-term functionality.
Step 5. Reassemble the Drain System:
Begin reassembling the drain system by carefully aligning the threaded sections and tightening them by hand. Once aligned, use a wrench or pliers to secure the connections firmly, but avoid over-tightening, as this could damage the fittings or seals. Ensure all components are correctly seated, and the plumber’s tape remains in place to maintain a watertight seal. After reassembly, inspect the system to confirm that all parts are securely connected and aligned.
Step 6. Test for Leaks:
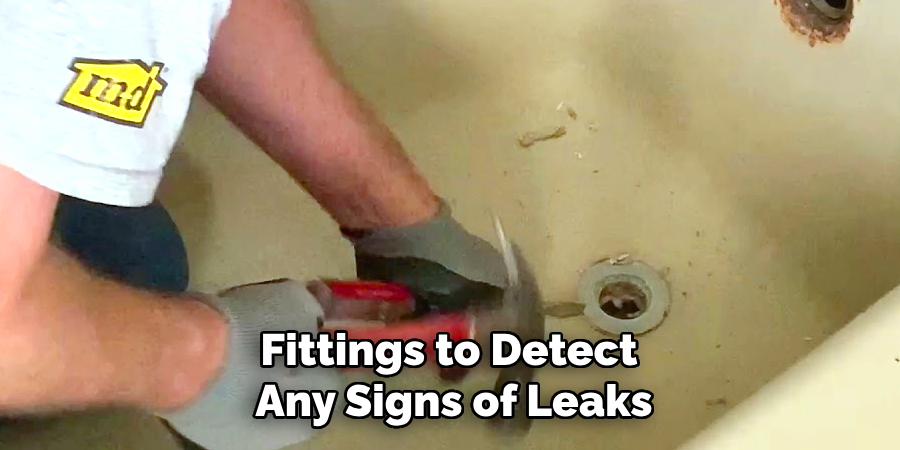
Once the drain system is fully reassembled, turn on the water to test for any leaks. Start by running a small amount of water and gradually increasing the flow while inspecting the connections for drips or moisture. Use a dry cloth or paper towel to wipe around the fittings to detect any signs of leaks. If a leak is found, turn off the water, disassemble the affected section, and reapply the plumber’s tape before re-tightening. Repeat the process until the system is completely watertight. Testing for leaks is crucial to ensure the drain system functions correctly without causing water damage.

Step 7. Clean Up and Restore the Area:
Clean up the workspace after confirming that the drain system is free of leaks. Remove any tools, towels, or leftover materials used during the repair. Wipe the area around the drain to eliminate any water spills or debris. Restore any objects or fixtures that were moved during the process, ensuring everything is back in its proper place. Taking time to clean up properly leaves the area neat and provides a clear space to monitor the drain system for any future issues.
Step 8. Perform Regular Maintenance:
Establish a routine for regular maintenance to keep the drain system functioning efficiently. Periodically inspect the drain for clogging, leaks, or wear and tear. Clean the drain by flushing it with hot water and vinegar or a commercially approved drain cleaner to prevent build-up. Additionally, check the fittings and seals to ensure they remain secure over time. Regular maintenance helps prolong the system’s lifespan and minimizes the risk of unexpected issues.
Step 9. Seek Professional Help When Necessary:
If persistent issues arise despite regular maintenance and cleaning efforts, it may be time to seek the help of a professional plumber. Complex problems such as severe blockages, pipe damage, or consistent leaks often require specialized tools and expertise. Attempting to resolve these issues without the proper knowledge can sometimes worsen the problem. A professional will assess the situation thoroughly and provide practical solutions, ensuring the drain system remains fully functional and preventing costly long-term damage.
Step 10. Replace Worn-Out Components:
Over time, specific drain system components, such as gaskets, seals, or pipe fittings, may become worn out or damaged. Regularly inspect these parts for signs of wear and consider replacing them when necessary to maintain the system’s efficiency. Using high-quality replacement parts compatible with your system can enhance durability and prevent future issues. Proactively addressing aging components ensures the drain system continues functioning smoothly and reduces the likelihood of breakdowns.

By following these simple steps, you can effectively repair a leaking drain and prevent further damage to your home.
5 Things You Should Avoid
- Using Excessive Force: Over-tightening the drain can damage the threads or crack the surrounding material, leading to costly repairs.
- Ignoring Proper Tools: Avoid using makeshift tools or inappropriate equipment, which may strip the drain or make the process more challenging.
- Skipping Drain Cleaning: Tightening a drain without cleaning it first can trap debris, leading to blockages and poor sealing over time.
- Using the Wrong Sealant: Applying an incorrect or low-quality sealant might not effectively stop leaks and could deteriorate quickly.
- Neglecting to Inspect for Underlying Issues: Tightening the drain without checking for potential damage, such as rust or worn-out gaskets, can result in persistent problems. Always address the root cause.
Conclusion
Tightening a loose bathtub drain doesn’t have to be daunting if approached with the right tools and knowledge.
You can effectively secure the drain and prevent leaks by following a systematic process, cleaning the area thoroughly, using the correct sealant, and avoiding common mistakes. Always remember to inspect for any underlying issues that might compromise the repair. Taking these precautions will ensure the job is done correctly and help maintain the longevity of your bathtub.
Hopefully, the article on how to tighten a loose bathtub drain has provided you with the necessary information to tackle this task confidently.

