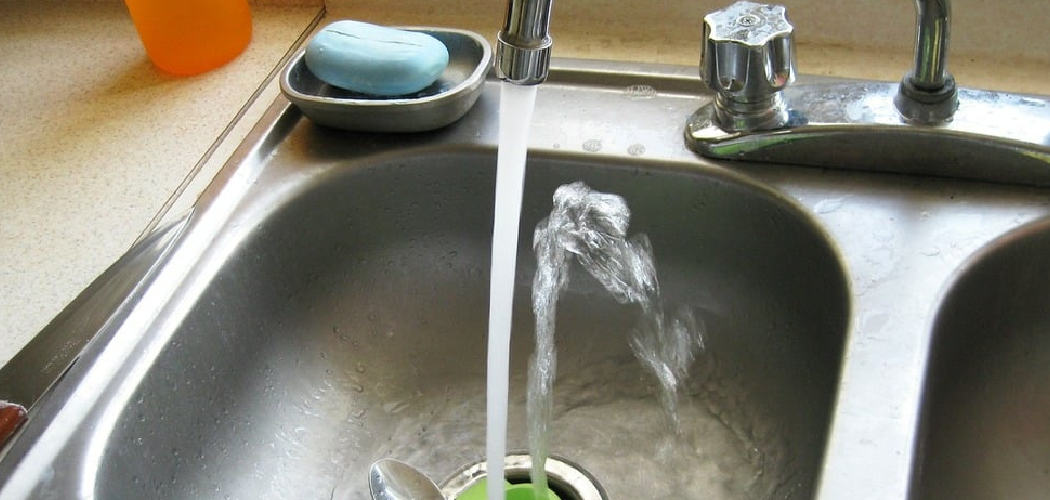
Maintaining a clean sink faucet head is essential for ensuring proper water flow and preventing the buildup of grime, mineral deposits, and bacteria. Over time, hard water and daily use can cause blockages or discoloration, but with a few simple steps, you can restore your faucet to its original condition. This guide will walk you through the process of how to clean a sink faucet head spotless and functioning efficiently.
Importance of Cleaning Faucet Heads
Regularly cleaning your faucet head is crucial for maintaining both hygiene and functionality in your home. Faucet heads are exposed to constant moisture, making them a prime breeding ground for bacteria and mold. Additionally, mineral deposits and limescale from hard water can accumulate over time, leading to reduced water pressure and uneven water flow.
Neglecting to clean your faucet head can also result in long-term damage, potentially requiring costly repairs or replacements. By keeping your faucet head clean, you ensure safe water for daily use, maintain efficient performance, and extend the lifespan of your plumbing fixtures.
Signs Your Faucet Head Needs Cleaning
- Reduced Water Pressure – If you notice a weaker water flow than usual, it may indicate that mineral deposits or debris are clogging the faucet head.
- Uneven Spray Pattern – A clogged or dirty faucet head can lead to an irregular water spray, with some holes blocked and others functioning improperly.
- Visible Mineral Build-Up – White, chalky residue or limescale on the surface of the faucet head is a clear sign that it needs cleaning.
- Discolored Water – Rusty or cloudy water coming out of your faucet can be a result of buildup inside the faucet head or connected components.
- Unpleasant Odors – A musty or foul smell from the faucet may develop due to mold or bacteria thriving inside the fixture.
If you notice any of these signs, it’s time to clean your faucet head to restore its functionality and ensure clean, safe water.
10 Methods How to Clean a Sink Faucet Head
1. Soak the Faucet Head in Vinegar for Deep Mineral Removal
A classic and highly effective method for cleaning a sink faucet head involves soaking it in white vinegar. Mineral deposits from hard water can accumulate inside and around the faucet head, leading to blockages and reduced water flow. To begin, remove the faucet aerator or unscrew the faucet head if detachable.
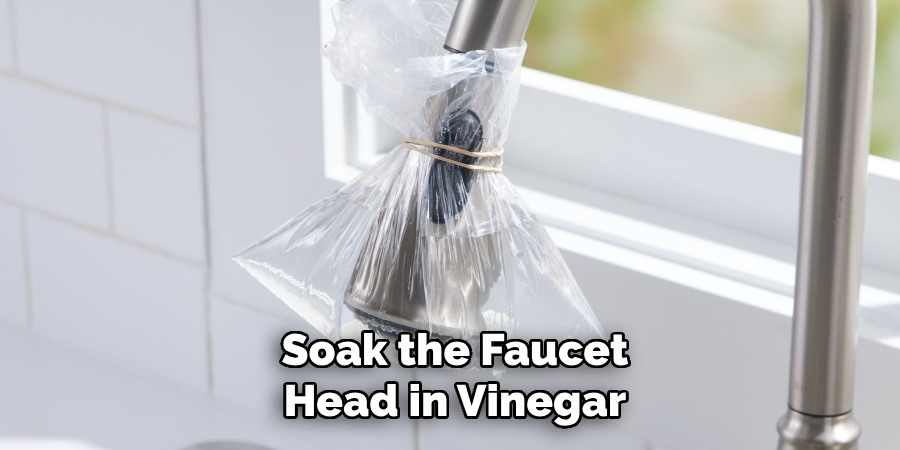
Place it in a bowl filled with white vinegar, ensuring it is completely submerged. Let it soak for 30 minutes to an hour. Vinegar’s natural acidity helps break down calcium and lime buildup. After soaking, use a soft toothbrush to scrub away loosened debris and rinse thoroughly with warm water before reattaching.
2. Use a Ziplock Bag and Rubber Band for Fixed Faucet Heads
If your faucet head cannot be removed easily, there’s still an effective method using everyday household items. Fill a small ziplock bag with white vinegar, then attach it to the faucet head using a rubber band or twist tie so that the faucet tip is submerged in the vinegar. Leave it in place for at least an hour—overnight for severe buildup.
This allows the vinegar to work on mineral and grime deposits. Once finished, remove the bag and run hot water to flush out the residues. This method is safe for most finishes and especially useful for awkwardly shaped fixtures.
3. Scrub with an Old Toothbrush for Precision Cleaning
For detailed scrubbing, an old toothbrush is an indispensable tool. The bristles can reach into crevices around the faucet’s aerator, spout, and nozzle. Start by dipping the toothbrush in vinegar or a mild soap solution, then scrub in small circles, focusing on the seams and areas where buildup is visible.
This hands-on method allows for precision and gentle pressure, minimizing the risk of damaging the finish while still dislodging stuck-on grime. This method is excellent when combined with soaking or vinegar bag methods to complete the cleaning process.
4. Use Baking Soda Paste for Tough Stains and Shine
Baking soda is a natural, non-abrasive cleanser that is perfect for polishing and removing persistent residue from the faucet head. Create a thick paste by mixing baking soda with a small amount of water. Apply it directly to the faucet head, especially around stubborn stains or crusty deposits. Allow it to sit for 15–20 minutes.

Then, scrub gently with a soft sponge or toothbrush and rinse with warm water. This method not only lifts grime but also restores a gentle shine to the metal without the use of harsh chemicals.
5. Clean the Aerator Screen Separately for Water Flow Restoration
The aerator screen, often located at the tip of the faucet head, plays a crucial role in regulating water flow and can become clogged over time. Carefully unscrew the aerator using your fingers or a rubber jar opener. Disassemble it, noting the order of the components. Soak each part in vinegar to dissolve mineral deposits, then use a toothpick or small brush to clean out any lingering particles. Rinse thoroughly and reassemble. A clean aerator helps prevent splashing and improves water pressure, making this step essential to faucet maintenance.
6. Apply Lemon Juice for Natural Freshness and Shine
Lemon juice, like vinegar, contains citric acid that can break down mineral deposits and grime. It also adds a fresh scent to your cleaning routine. Cut a lemon in half and rub it directly onto the faucet head, especially if there is noticeable buildup or discoloration. For internal cleaning, soak a cloth or paper towel in lemon juice and wrap it around the faucet head for 20–30 minutes. Afterward, scrub lightly and rinse clean. The lemon juice not only cleans but also helps to remove water spots, leaving a sparkling finish.
7. Use a Toothpick or Safety Pin for Clearing Nozzles
Faucet heads often contain tiny nozzle holes where water exits. Over time, these can become partially clogged by sediment or calcium buildup, especially in hard water areas. Use a toothpick, safety pin, or needle to gently poke and dislodge any debris from these small holes. Be careful not to apply too much force to avoid damaging the nozzles. Follow up with a strong water flush to push out any loosened particles. This simple step can dramatically improve water flow and restore even spray patterns.
8. Disinfect with Mild Bleach Solution if Needed
If your faucet head shows signs of mold, mildew, or bacterial buildup—common in damp bathroom environments—you may consider disinfecting it with a diluted bleach solution. Mix one part bleach with ten parts water and apply it using a cloth or sponge. Avoid using bleach on bronze or antique finishes.

Let it sit for a few minutes before rinsing thoroughly with water. Always wear gloves and ensure proper ventilation when using bleach. This method ensures a sanitized faucet head, especially important in areas of frequent contact.
9. Polish with Microfiber Cloth for a Final Touch
Once your faucet head is clean, it’s worth taking the time to polish it to a brilliant shine. Using a clean, dry microfiber cloth, buff the faucet head in small circular motions. This helps remove water spots and any remaining residues. Microfiber is gentle on delicate finishes and won’t leave scratches, making it ideal for chrome, stainless steel, and brushed nickel surfaces. Not only does polishing improve appearance, but it also provides a layer of protection against fingerprints and future buildup.
10. Establish a Routine Cleaning Schedule to Prevent Buildup
To maintain a consistently clean and functional sink faucet head, it’s important to adopt a regular cleaning schedule. Incorporate quick wipe-downs into your weekly bathroom or kitchen cleaning routine. Once a month, consider removing or soaking the faucet head in vinegar or giving it a baking soda scrub to prevent significant mineral deposits from forming. This proactive approach saves time and effort in the long run and ensures that your faucet continues to perform optimally while remaining aesthetically pleasing.
Things to Consider When Cleaning a Faucet Head
Material Compatibility
Before using any cleaning solution, check the material of your faucet head. Some finishes, like chrome or brass, may require gentle, non-abrasive cleaners to avoid scratches or discoloration.
Water Quality
The hardness of your water plays a significant role in how quickly mineral deposits build up. If you have hard water, cleaning may need to be more frequent or require stronger descaling solutions.

Frequency of Use
Faucets in high-traffic areas, such as the kitchen, tend to accumulate grime and debris faster than those in less-used spaces like guest bathrooms. Tailor your cleaning schedule accordingly.
Safety Precautions
When using chemical cleaners, ensure proper ventilation and wear gloves to protect your skin from irritation. Natural solutions like vinegar or baking soda are safer alternatives and just as effective in most cases.
By considering these factors, you can extend the lifespan of your faucet while ensuring it remains clean, functional, and visually appealing.
Conclusion
Cleaning a sink faucet head may seem like a small task, but it plays a big role in maintaining both hygiene and water efficiency in your kitchen or bathroom. Whether you prefer natural cleaning agents like vinegar and lemon juice or rely on scrubbing tools and routine maintenance, these methods offer versatile solutions tailored to various needs and faucet styles. So, there you have it – a quick and easy guide on how to clean a sink faucet head.

