Replacing a bathroom fan can improve ventilation, reduce moisture buildup, and enhance the overall comfort of your space. While the task might seem daunting at first, it’s a straightforward process that can often be completed with basic tools and a little patience. This guide will walk you through the steps of how to change a bathroom fan, ensuring optimal performance and longevity.

Reasons to Change a Bathroom Fan
There are several reasons why you might need to replace your bathroom fan. Over time, fans can become noisy or inefficient, making them less effective at removing moisture and odors from the space. A malfunctioning fan can lead to issues such as excessive humidity, which may cause mold growth and damage to walls, ceilings, or fixtures.
Additionally, upgrading to a modern fan can improve energy efficiency, reduce noise levels, and provide better air circulation. Lastly, aesthetic updates or home renovations might also prompt the need for a new fan that aligns with the style and functionality of your bathroom.
Tools and Materials Needed
To successfully replace or install a bathroom fan, you’ll need the following tools and materials:
- Screwdriver (Phillips and flathead) – For removing the old fan and installing the new one.
- Step ladder – To safely reach the ceiling.
- Measuring tape – To ensure the new fan fits the existing space.
- Power drill – For securing the fan housing and mounting hardware.
- Wire cutters/strippers – To handle electrical wiring.
- Voltage tester – To confirm the power has been turned off before working on electrical components.
- Vent ducting – If replacement or modification to the venting system is required.
- Foil tape – For sealing duct connections securely.
- Safety gear – Including safety goggles and gloves to protect yourself during installation.
- New bathroom fan – Ensure it meets the required specifications for your space and needs.
By gathering these tools and materials ahead of time, you’ll be well-prepared to complete your project efficiently and safely.
10 Methods How to Change a Bathroom Fan
1. Start by Turning Off the Power and Ensuring Safety
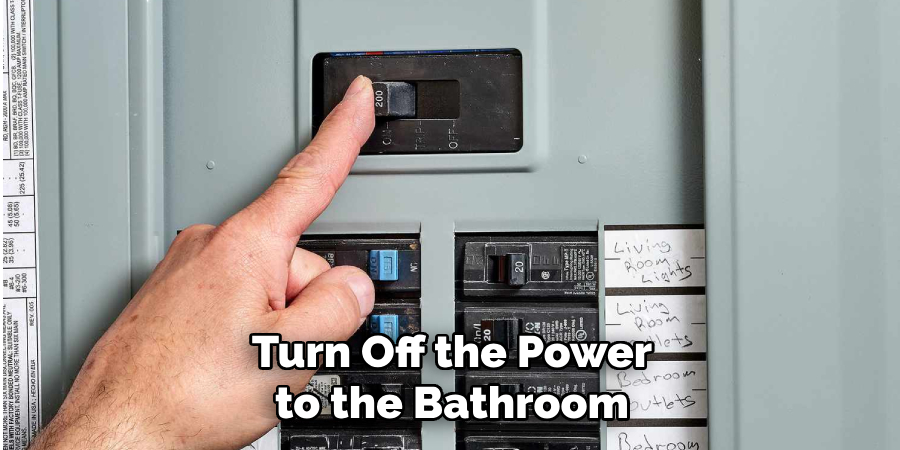
The first and most critical step before handling any electrical appliance is to shut off power at the breaker box. Bathroom fans are typically wired to light switches, so simply flipping the wall switch off isn’t enough. Locate the correct circuit in your breaker panel and switch it off, then double-check by trying the fan to confirm it no longer powers on.

Once off, use a voltage tester on the wiring during removal to guarantee no residual current is present. Wearing insulated gloves and safety glasses adds an extra layer of protection.
2. Remove the Fan Grille and Clean the Area
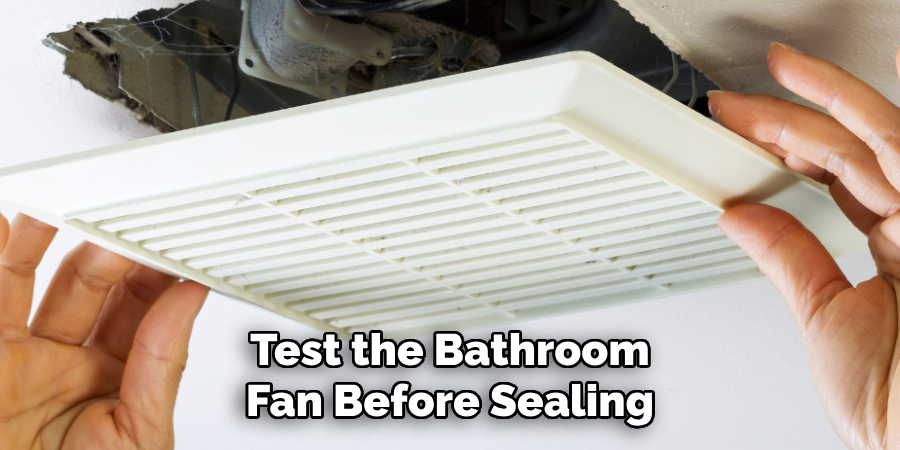
To access the fan, remove the plastic grille cover, which is usually attached by spring clips or a simple pull-tab design. Gently squeeze or unhook the clips to detach it from the ceiling. Once removed, take a moment to clean the area around the fan. Over time, dust and debris can accumulate, and cleaning it now will make the removal process smoother and help you start fresh with your new fan.
3. Detach the Old Fan Housing
After the grille is removed, you’ll need to locate the mounting screws or brackets that secure the fan housing to the ceiling joists. Using a screwdriver or drill, carefully remove these fasteners. If your fan is mounted between joists using a bracket system, you may need to remove the entire mounting frame. In some cases, the housing is also nailed into place from above, which can make removal tricky if there’s no attic access. In such scenarios, consider carefully cutting around the housing with a drywall saw to loosen the unit.
4. Disconnect the Electrical Wiring
With the housing freed, you can now expose the wiring. Locate the wire box on the side of the fan, unscrew the cover, and examine how the wires are connected. Typically, you’ll find a black (hot), white (neutral), and green or bare (ground) wire.

Loosen the wire nuts or screws and gently pull the wires free from the old fan. It’s wise to label the wires or snap a quick picture to help you remember the connections when installing the new fan.
5. Disconnect and Remove the Ductwork
Bathroom fans are connected to a duct system that channels moist air outside. Carefully detach the flexible or rigid duct from the fan housing. Most connections are held together with metal clamps, tape, or zip ties. Loosen or cut these fasteners, then gently pull the duct away. Be cautious not to damage the ductwork, as a secure and sealed fit is essential for proper airflow in your new setup.
6. Choose a Compatible Replacement Fan
Before purchasing a new fan, measure the dimensions of your old housing and note the duct size. Many modern fans are designed to fit standard cutouts, but if your original fan is outdated, you may need to expand the ceiling opening or adjust your ducting. Choose a model that matches your bathroom’s size in terms of air movement, rated in cubic feet per minute (CFM). Quiet operation, energy efficiency, and lighting options are also worth considering.
7. Install the New Housing and Secure It in Place
Place the new fan housing into the ceiling opening. If working from below, you may need to anchor it to a joist using mounting brackets or screws, depending on the manufacturer’s design. Some units offer retrofit brackets that make installation easier from inside the bathroom. Ensure the housing is level and flush with the ceiling surface, as this will affect the grille’s appearance and the fan’s operation.
8. Reconnect the Wiring and Ductwork
Once the housing is secured, pull the previously labeled wires into the new unit’s electrical box and connect them according to the manufacturer’s wiring diagram. Typically, black to black, white to white, and ground to ground. Twist the wire connectors tightly and secure the wires neatly inside the box. After wiring, reattach the duct to the new fan’s vent port using clamps or foil tape to ensure a tight seal and optimal airflow performance.
9. Test the Fan Before Sealing Up
Before sealing the fan with the grille or caulk, turn the power back on at the breaker to test your installation. Flip the switch and confirm that the fan powers up, runs smoothly, and draws air. Listen for excessive noise or vibration, which could indicate a loose mount or misaligned part. If the fan includes a light, check that the lighting functions as well. Testing at this stage saves you from re-opening the ceiling if something’s amiss.

10. Attach the Grille and Finish with Caulking or Paint Touch-Up
Once everything checks out, attach the grille cover by reconnecting the spring clips or sliding it into place. If the new fan’s housing is slightly different in size than the original, you may need to apply caulk around the edges to conceal small gaps and create a clean finish. Use paintable caulk if you plan to match it to the ceiling color. If drywall patches were made, consider a quick coat of primer and paint to make your ceiling look as good as new.
Things to Consider When Choosing a Bathroom Exhaust Fan
When selecting a bathroom exhaust fan, there are several important factors to keep in mind. First, determine the appropriate fan size by considering the square footage of your bathroom. A fan that’s too small may not effectively remove moisture, while an oversized fan can be unnecessarily noisy and waste energy. Next, check the fan’s noise level, typically measured in sones.
Opt for a low-sone fan if a quieter operation is a priority for you. Additionally, consider energy-efficient models to save on utility costs in the long run. Finally, look at the additional features, such as built-in lights, heaters, or humidity sensors, to enhance your bathroom’s functionality and comfort.
Maintenance and Upkeep
To ensure your bathroom fan operates efficiently and lasts for years, regular maintenance is essential. Start by cleaning the fan blades and grille at least twice a year to remove dust, debris, and any buildup that could hinder performance.
Turn off the power before cleaning, and use a vacuum or a damp cloth to gently wipe away dirt. Check the fan motor and housing for signs of wear or damage, as a struggling motor can lead to inefficiency or noise issues.

Replace the fan filter if your model includes one, following the manufacturer’s recommendations. Additionally, inspect the exhaust duct for blockages to maintain proper airflow. With consistent upkeep, your bathroom fan will continue to provide optimal performance, improve ventilation, and contribute to a healthier space.
Conclusion
Changing a bathroom fan is a manageable project that offers big payoffs in comfort and air quality. Whether you’re replacing an old, noisy unit or upgrading to a more energy-efficient model, the process requires care, patience, and attention to safety. From cutting the power to choosing the right replacement, and from securing the duct to testing your work, each method outlined above ensures your fan replacement is done properly. So, there you have it – a quick and easy guide on how to change a bathroom fan.

