Sealing tape is a crucial tool for creating a watertight barrier around bath areas, effectively preventing water leaks and protecting against moisture damage. Designed to adhere tightly to surfaces, it helps safeguard against common issues such as mold and mildew growth, which can compromise the hygiene and durability of your bathroom over time. Applying sealing tape correctly is critical to ensuring that the seal remains effective and long-lasting, providing an airtight and waterproof barrier for everyday use.

This article serves as a comprehensive step-by-step guide on how to apply sealing tape around bath areas, offering practical advice to achieve a smooth, professional finish. Whether you’re a DIY enthusiast or looking to improve your bathroom’s longevity, understanding this process will help you create a durable solution to prevent costly water damage.
Materials and Tools Needed
Essential Materials
- Sealing tape (silicone-based or waterproof bathroom sealing tape).
- Scissors or utility knife for cutting the tape to the desired length.
- Measuring tape or ruler to ensure precise measurements for a snug fit.
- Cleaning supplies, such as an all-purpose cleaner or rubbing alcohol, to prepare the surface for application.
- Masking tape (optional), useful for creating neat, straight lines during the application process.
- A caulking gun (optional, if you plan to use silicone caulk as an additional reinforcement).
Tools You’ll Need
- A small cloth or sponge to clean and dry the surface before and after application.
- A scraper or putty knife to remove any old sealant or adhesive residue, ensuring a smooth surface for the new seal.
- Gloves (optional), which can be worn during cleaning and application for added hygiene and protection.
By gathering all the necessary materials and tools beforehand, you can ensure a seamless and efficient process, avoiding unnecessary interruptions. Proper preparation is key to achieving a professional-looking seal that can withstand everyday use.
Preparing the Area
Proper preparation of the area is essential to ensure a durable and professional finish when applying sealing tape. Follow these steps to prepare the bath area effectively:
Step 1: Clean the Bath Area
Begin by thoroughly cleaning the surface where the sealing tape will be applied, focusing on the edges of the bath and the adjoining wall. Use a cleaner designed to remove soap scum, grease, and grime to create a smooth base. After cleaning, wipe the area with a clean cloth to remove any residue and ensure it is dry.
Step 2: Remove Old Sealant (If Necessary)
If there is existing caulk or sealant around the bath, remove it carefully using a scraper or putty knife. Work slowly to avoid damaging the bath’s surface or surrounding tiles. Scrape away all remnants of the old sealant, ensuring the area is completely smooth and residue-free.
Step 3: Dry the Surface
Before applying the sealing tape, ensure that the bath and the surrounding area are completely dry. Moisture can prevent the tape from adhering properly, compromising its effectiveness. Use a dry, lint-free cloth to check for any remaining dampness, and allow additional drying time if necessary.
Measuring and Cutting the Sealing Tape
Step 1: Measure the Length of the Area to be Sealed
Use a measuring tape to determine the exact length of the gap between the bath and the wall where the sealing tape will be applied. Be precise with your measurements to prevent gaps or overlaps. Adding a small amount of extra length—just a few millimeters—can ensure that the tape extends fully across the area, providing a complete seal and avoiding potential weak spots.

Step 2: Cut the Sealing Tape to Size
After measuring the required length, use a sharp pair of scissors or a utility knife to cut the sealing tape to size. It is vital to make clean, straight cuts to ensure the tape fits neatly into the gap and adheres properly. A wavy or uneven cut might leave exposed areas, compromising the seal’s durability and appearance. If the tape is pre-measured to the correct width, this step will only involve trimming to the appropriate length.
Step 3: Ensure the Tape is the Correct Width
Before applying the tape, confirm that its width matches the area you want to seal. If the tape is wider than the gap, you can carefully trim the edges using scissors or a utility knife for a snug fit. Ensure the tape’s reduced width is still sufficient to provide ample coverage to create a watertight seal. Taking the time to adjust the width, if needed, will help the sealing tape align perfectly with the gap between the bath and the wall, enhancing its overall effectiveness.
How to Apply Sealing Tape Around Bath Applying the Sealing Tape
Step 1: Start from One End
Peel the backing off the sealing tape, starting from one end. Align the tape along the edge of the bath, ensuring it’s positioned evenly with the surface. Take your time to make sure the starting point is secure, as this will help maintain a straight application along the entire gap. Proper alignment at this stage is critical for creating a professional and effective seal.
Step 2: Press the Tape Firmly into Place
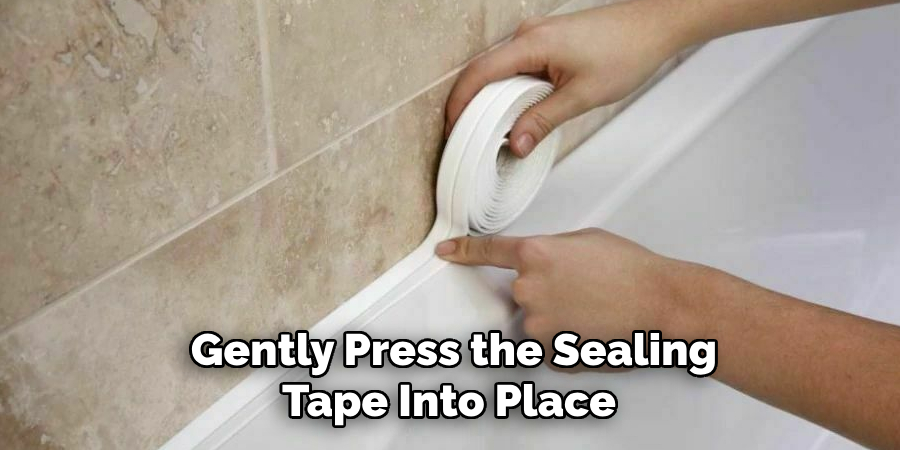
Gently press the sealing tape into place, starting at one end and moving gradually to the other. Use your fingers or a small, flat tool, such as a plastic scraper, to apply consistent pressure along the length of the tape. This step helps ensure the adhesive fully bonds to the surface, preventing future peeling or gaps. Pay special attention to corners or curves, pressing firmly to create a smooth and continuous seal.

Step 3: Avoid Overlapping
Be mindful not to overlap sections of the sealing tape, as doing so can cause uneven coverage or create weak spots that may compromise the watertight seal. Instead, maintain a continuous, edge-to-edge application. For longer gaps, ensure that any necessary seams are neatly butted together rather than overlapped, leaving no gaps in between. Carefully following this step will enhance the durability and performance of the seal.
Sealing the Edges
Step 1: Smooth Out the Edges
Once the tape is applied, smooth the edges to ensure they’re firmly pressed against the surface. Use a flat tool, such as a putty knife or a plastic scraper, to press down the edges evenly and eliminate any air bubbles. For an added layer of protection, you can use a caulking gun with silicone or acrylic caulk along the edges of the tape. This optional step enhances adhesion and ensures a watertight barrier, especially in areas prone to moisture.
Step 2: Ensure a Tight Seal
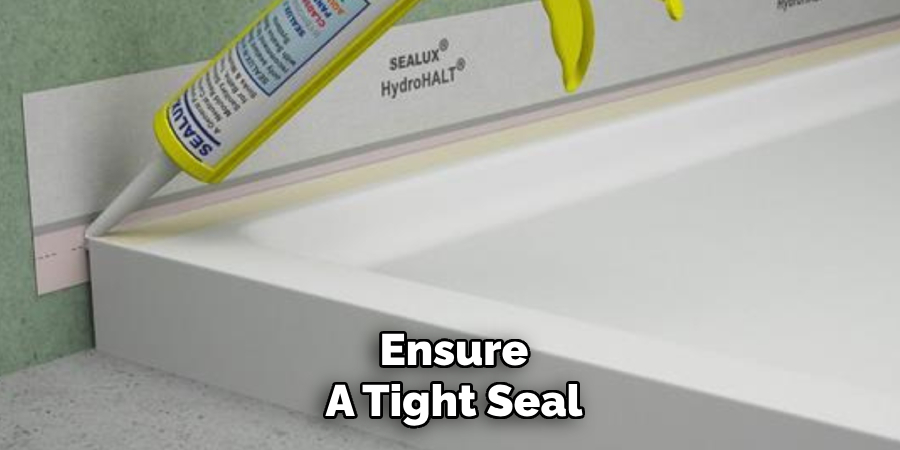
If you choose to use caulk, apply a thin, consistent line along the edges where the tape meets the surface, whether it’s a wall, a countertop, or other areas. Gently smooth the caulk using a damp finger, a rounded tool, or a designated caulking tool to create a neat finish. Once completed, immediately wipe away any excess caulk with a damp cloth to keep the area clean and professional-looking.

This step ensures that the tape remains secured and improves the overall resilience of the seal against wear and tear over time. Properly sealing the edges is key to achieving a durable, polished result.
Cleaning and Final Touches
Step 1: Clean Up Any Residue
Once the sealing process is complete, carefully clean any excess tape or caulk residue from the surrounding area. Use a damp cloth or sponge and gently wipe the surface to remove any leftover materials. This step ensures the surface maintains a clean, tidy appearance and eliminates any unwanted mess.
Step 2: Check for Proper Adhesion
Inspect the tape to ensure it is securely adhered to the surface. Check that the edges are fully sealed and level, with no signs of peeling or gaps. Proper adhesion is essential for the seal to remain durable over time and prevent water or debris from seeping underneath.
Step 3: Allow Time to Set
If additional caulk was applied during the process, it is essential to allow it to cure fully according to the manufacturer’s recommendations. Curing times may vary, so be sure to confirm the instructions. Avoid exposing the area to water or heavy use until the caulk has set correctly, as this will preserve its integrity.
Step 4: Inspect the Finished Seal
After the area has dried, inspect the finished seal closely. Look for any gaps, air bubbles, or imperfections that could compromise the seal’s durability. Address any issues immediately to ensure a professional and polished result. A thorough inspection guarantees long-lasting performance and a visually pleasing finish.
Troubleshooting and Tips
Reapply Tape If Necessary
If the sealing tape doesn’t adhere properly or you notice visible gaps, it’s essential to address the issue promptly. Remove the problematic tape and thoroughly clean the surface again to ensure it’s free of dust, debris, or residue. Proper surface preparation is critical for achieving a secure and long-lasting seal. Once cleaned, reapply the tape carefully, pressing it firmly into place to prevent further adhesion issues.
Avoid Water Exposure During Curing
One of the most common mistakes is exposing the new tape or caulk to moisture prematurely. Water can weaken the bond and compromise the seal’s integrity if introduced before the materials have fully cured. To avoid this problem, refer to the manufacturer’s curing time guidelines and ensure the area remains dry throughout the process.
Regular Maintenance
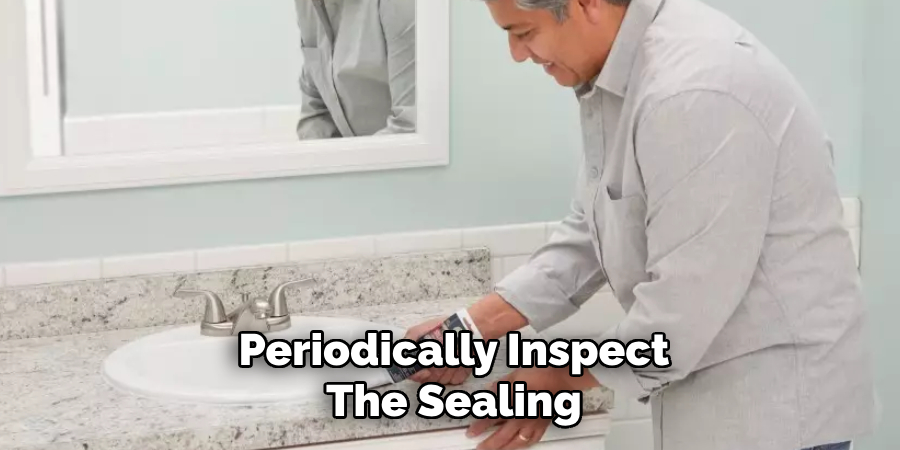
Maintaining the seal over time is key to its effectiveness. Periodically inspect the sealing tape for any signs of wear, mold buildup, or damage. Replace the tape as needed to ensure a reliable barrier against moisture. Regular maintenance not only extends the seal’s lifespan but also prevents potential water damage in the future.

Conclusion
Learning how to apply sealing tape around bath areas is essential for achieving a durable, waterproof solution. The process begins with cleaning the surface thoroughly to remove debris, measuring and cutting the tape to fit, and carefully applying it with precision. Lastly, sealing the edges ensures an effective moisture barrier. Proper installation is critical to creating a long-lasting, mold-resistant seal that protects against water damage. Take your time during application to achieve a smooth and professional finish, and always follow best practices for the best results. A little patience ensures a clean and effective outcome.

