Are you tired of showering under a weak or uneven water stream? Do your shower head rubber nozzles get clogged with mineral deposits, dirt, and grime over time? If yes, it’s time to clean them!
Over time, shower head rubber nozzles can become clogged with mineral deposits, reducing water flow and affecting your shower experience. Regular cleaning of these nozzles is essential for maintaining a powerful and even water flow, ensuring your showers remain refreshing and invigorating.
In this guide, we’ll walk you through a simple yet effective method of how to clean shower head rubber nozzles, using easily accessible household items. This process not only restores the functionality of your shower head but also extends its lifespan, proving that a little maintenance goes a long way in preserving the quality of your daily routines.
What are the Benefits of Cleaning Shower Head Rubber Nozzles?
Apart from improving the water flow and pressure, there are several other benefits to cleaning shower head rubber nozzles regularly. These include:
- Preventing Bacteria and Mold Buildup: Moisture-rich environments like bathrooms can be breeding grounds for bacteria and mold. Cleaning your shower head nozzles can prevent these harmful microorganisms from accumulating and potentially causing health issues.
- Removing Mineral Deposits: Hard water can leave mineral deposits on your shower head nozzles, making them look unsightly and reducing their effectiveness. Regular cleaning helps remove these deposits and prevents build-up, keeping your shower head looking clean and functioning well.
- Saving Money: Properly maintaining your shower head can prolong its lifespan and avoid costly replacements in the long run. Regular cleaning also helps prevent potential damage caused by clogged nozzles, saving you from expensive repairs.
- Eco-friendly: Cleaning your shower head nozzles can positively impact the environment. As mineral deposits are removed, water flow is improved, reducing the amount of water wasted during showers.
What Will You Need?
Before beginning the cleaning process, make sure you have the following items on hand:
- White Vinegar: This household staple is a natural cleaning agent and helps dissolve mineral deposits.
- Water: You will need water to mix with the white vinegar for the cleaning solution.
- Plastic Bag or Rubber Band: These items will be used to secure the cleaning solution over your shower head.
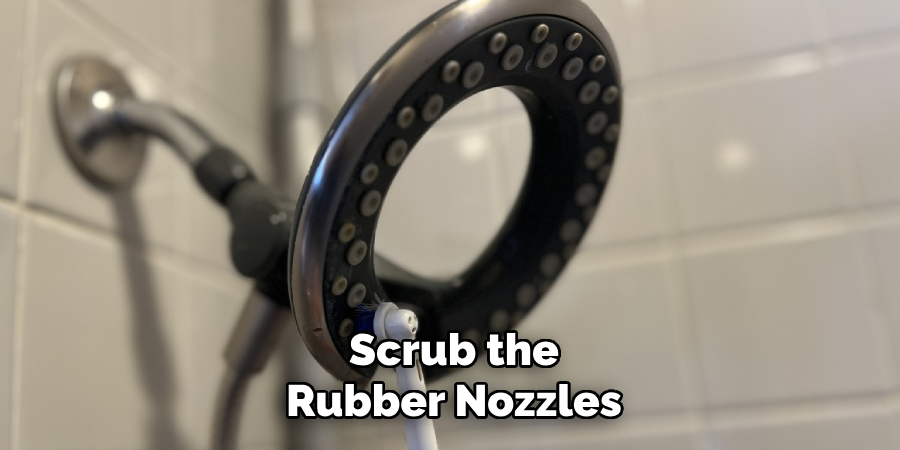
- Toothbrush: A soft-bristled toothbrush will be used to scrub the rubber nozzles.
Once you have all the necessary items, you can start cleaning!
10 Easy Steps on How to Clean Shower Head Rubber Nozzles
Step 1: Prepare the Cleaning Solution
Mix equal parts of white vinegar and water in a mixing bowl or measuring cup. You can adjust the ratio depending on how clogged your shower head nozzles are. For more severe build-up, use a higher concentration of vinegar.
Step 2: Remove the Shower Head
Detach the shower head from the hose or wall mount by unscrewing it manually. In most cases, this can be done without needing tools, but if the shower head is firmly secured, you might need a wrench or pliers. If using tools, wrap the shower head and the tool with a cloth to prevent scratching the surface.
Once removed, this will give you better access to the rubber nozzles and enable a more thorough cleaning process. If you cannot remove the shower head, don’t worry; there are still effective ways to clean the nozzles as they are.
Step 3: Submerge the Shower Head in the Solution
Pour the vinegar and water solution into a large bowl or plastic bag large enough to fully submerge the shower head. Place the shower head directly into the bowl if you’ve removed the shower head. If the shower head is still attached and cannot be removed, fill the plastic bag with the solution and carefully secure it around the shower head using a rubber band, ensuring that all the rubber nozzles are immersed.
Leave the shower head to soak in the solution for at least 30 minutes to a few hours. For shower heads with significant mineral buildup, it might be beneficial to leave them soaking overnight. This soaking process helps break down and dissolve mineral deposits, making them easier to remove.
Step 4: Scrub the Nozzles
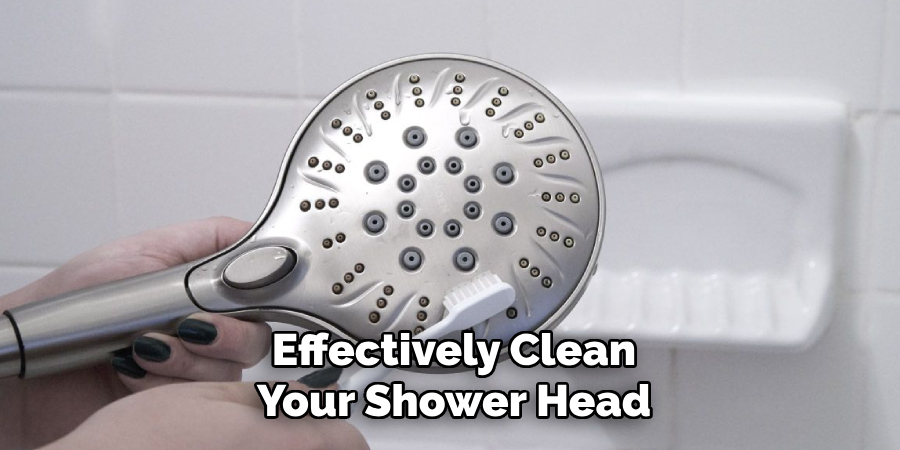
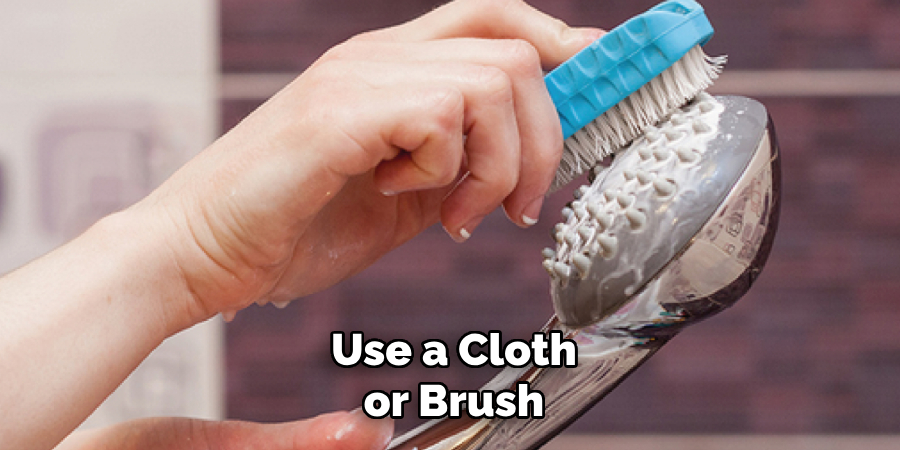
After soaking, take a soft-bristled toothbrush and gently scrub the rubber nozzles on the shower head. This action will help dislodge any remaining mineral deposits and dirt that the soaking process has loosened but not fully dissolved.
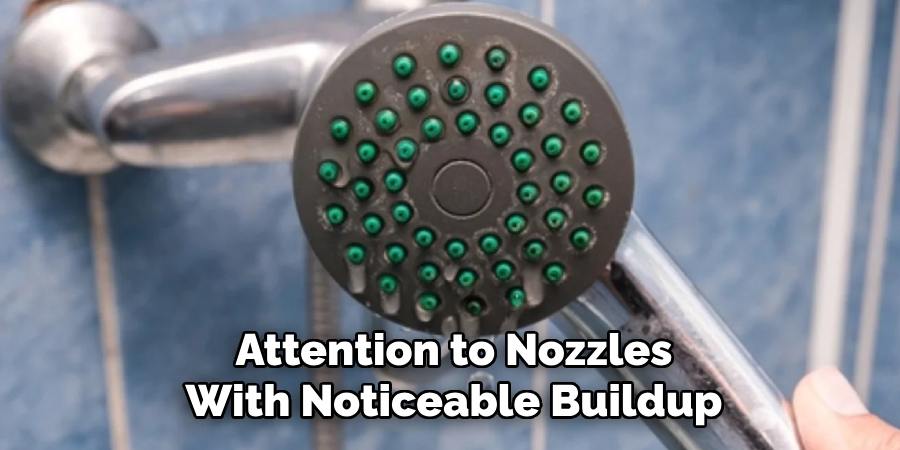
Pay special attention to nozzles with noticeable buildup, ensuring all sides of each nozzle are brushed. If the shower head was soaked in a bag while still attached, be sure to carefully remove the bag first, then proceed with scrubbing the nozzles as accessible.
Step 5: Rinse the Shower Head
Once you’ve thoroughly scrubbed the rubber nozzles, it’s time to rinse the shower head. If you detach the shower head, rinse it under a stream of warm water in the sink, ensuring that all the vinegar solution and dislodged debris are completely washed away.
For shower heads that remain attached, turn on the warm water and allow it to run through the shower head for several minutes. This step helps remove any remaining vinegar solution and loosened deposits. Make sure to direct the water flow through all nozzles to ensure a thorough rinse.
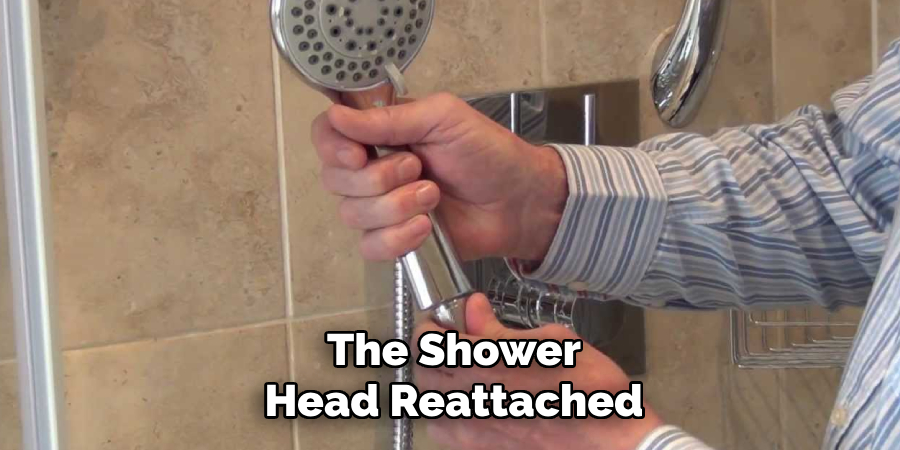
Step 6: Reattach the Shower Head
If you had previously removed the shower head, now is the time to reattach it to the hose or wall mount. Carefully screw it back into place, ensuring it is secure but not overly tightened. If you used a wrench or pliers for removal, use them again here, taking care to wrap the shower head and tool with a cloth to protect the surface from scratches.
Once securely reattached, briefly turn on the water to check for leaks. If leaks are detected, slightly tighten the shower head until the leak stops, but avoid over-tightening, as this can damage the threads or the shower head itself.
Step 7: Perform a Final Check
With the shower head reattached and no leaks present, turn on the shower to finally check the water flow through the rubber nozzles. You should notice an improved flow and even distribution of water. If any nozzles still seem to be blocked, a gentle poke with a toothpick or a similar soft, thin object can help remove any lingering debris. Be gentle to avoid damaging the nozzles.
Step 8: Regular Maintenance
Consider incorporating this cleaning process into your home maintenance routine to prevent future buildup and ensure a consistently pleasant shower experience. Cleaning your shower head rubber nozzles once every month or two can drastically reduce the likelihood of mineral deposits and bacteria growth.
Regular maintenance not only prolongs the life of your shower head but also contributes to your overall health and well-being by providing a clean, refreshing shower experience.
Step 9: Disinfect the Shower Head
For extra cleanliness, consider disinfecting the shower head after the vinegar soak and scrub. To do this, mix a solution of water and a few drops of bleach or a non-toxic disinfectant.
Submerge the shower head in this solution for about 10 minutes, or if the shower head is still attached, fill a plastic bag with the solution and secure it around the shower head as before. This step will help kill any lingering bacteria or germs. Remember to rinse the shower head thoroughly with water after disinfecting to ensure no chemical residue remains.
Step 10: Enjoy Your Clean Shower Head
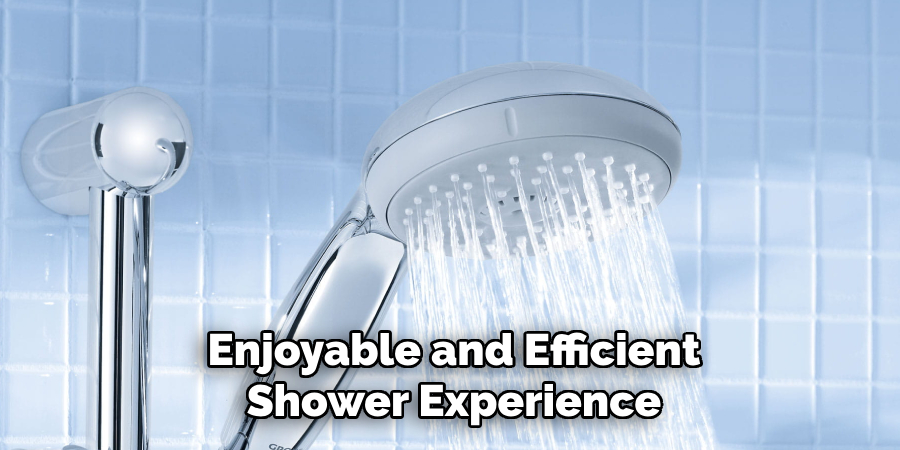
With your shower head now clean, reattached, and free of mineral buildup and bacteria, you can enjoy a refreshing and invigorating shower experience. The improved water flow and distribution will enhance your shower’s performance, contributing to a more enjoyable and efficient cleaning routine. Keep up with the regular maintenance schedule to continually enjoy the benefits of a clean and fully functional shower head.
By following these steps, you can effectively clean your shower head and maintain its optimal performance for a long time to come.
5 Additional Tips and Tricks
- Use Baking Soda Paste: Mix baking soda with water to create a paste. Apply this paste directly onto the rubber nozzles and gently scrub with a toothbrush. Baking soda is a gentle, natural abrasive that helps remove buildup without damaging the rubber.
- Employ Vinegar Soak for Stubborn Grime: If the nozzles are heavily clogged, fill a plastic bag with white vinegar and secure it around the shower head, submerging the nozzles. Leave it to soak overnight. Vinegar is excellent for dissolving hard water deposits and clearing blockages.
- Utilize a Dental Pick for Tough Deposits: For mineral deposits that won’t budge, carefully use a dental pick to gently pry and scrape them away. Be cautious not to puncture or damage the rubber.
- Rinse Thoroughly with Hot Water: After cleaning, make sure to rinse the shower head and nozzles thoroughly with hot water. This removes any remaining cleaning solution and loosened debris, ensuring a clear water flow.
- Add Essential Oils for a Natural Fragrance: Once the nozzles are clean and unclogged, add a few drops of your favorite essential oil (such as lavender or eucalyptus) to the shower head. This not only leaves a pleasant scent but also helps prevent future buildup.
With these additional tips and tricks, you can keep your shower head rubber nozzles clean, unclogged, and functioning properly for a more enjoyable and efficient shower experience.
5 Things You Should Avoid
- Avoid Using Harsh Chemicals: Steer clear of cleaners with harsh chemicals like bleach or ammonia, as these can degrade the rubber material of your nozzles over time. Opt for gentler, natural cleaners to ensure longevity.
- Don’t Use Abrasive Brushes or Pads: Though it might be tempting, refrain from using steel wool or abrasive scrubbing pads, which can cause scratches or damage to the rubber and the surrounding metal. A soft toothbrush is usually sufficient for effective cleaning.
- Avoid Over-Scrubbing: Applying too much pressure or over-scrubbing can wear down the rubber nozzles, potentially leading to leaks. Gentle, circular motions are more than enough to dislodge most buildups.
- Avoid Ignoring Manufacturer’s Instructions: Always consult your shower head’s user manual for specific maintenance recommendations. Using methods or products not endorsed by the manufacturer could void your warranty or damage the nozzles.
- Don’t Skip Regular Maintenance: Neglecting routine cleaning can lead to the accumulation of mineral deposits and mold, making cleaning more difficult and potentially compromising the function and durability of the nozzles. A consistent cleaning schedule prevents build-up and is less hazardous to your shower head’s longevity.
By avoiding these common mistakes and following the tips outlined in this guide, you can ensure your shower head rubber nozzles stay clean and functioning for years to come.
Some Frequently Asked Questions
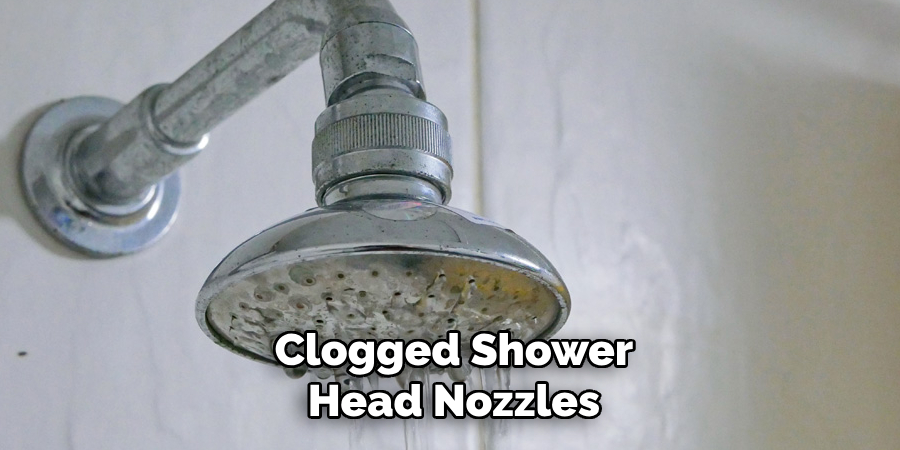
1. What are the Causes of Clogged Shower Head Nozzles?
Several reasons your shower head nozzles may become clogged over time. Some common causes include:
- Hard Water: High mineral content can accumulate and clog the rubber nozzles if you have hard water in your home.
- Soap Scum: Soap residue and minerals from soap can build up on the nozzles, especially if they are not cleaned regularly.
- Limescale: Similar to hard water, limescale is a deposit of calcium carbonate that can accumulate on the nozzles and cause blockages.
- Rust: Over time, rust can build up in your plumbing system and reach your shower head, causing clogs in the nozzles.
- Mold or Mildew: If you don’t regularly clean your shower head, mold or mildew may grow in the nozzles, blocking water flow.
By knowing the potential causes of clogged shower head nozzles, you can take preventative measures to keep them clean and functioning properly. Regular cleaning and maintenance can help prevent build-up and prolong the life of your shower head.
2. Does Bleach Destroy Rubber?
Yes, bleach can damage rubber over time. Bleach is a harsh chemical that can cause the rubber to deteriorate and become brittle, leading to nozzle cracks and leaks. Using bleach on shower head rubber nozzles is not recommended as it can significantly reduce their lifespan.
Opting for gentler, natural cleaners is the best way to prevent damage and keep your shower head nozzles in good condition. However, if you choose to use bleach, dilute it properly and thoroughly rinse the nozzles afterward.
Overall, proper maintenance and cleaning techniques and avoiding harsh chemicals can help keep your shower head rubber nozzles clean, unclogged, and functioning for the long term.
3. What Makes Rubber White Again?
Rubber can become discolored over time, especially when exposed to certain substances or environmental factors. To make rubber white again, you can try the following methods:
- Bleach Solution: Dilute bleach with water and use a cloth or sponge to gently scrub the rubber’s stained areas. Rinse thoroughly afterward.
- Lemon Juice and Sunlight: Squeeze fresh lemon juice onto the stained areas and leave in direct sunlight for several hours. Rinse and scrub with a cloth or sponge.
- Hydrogen Peroxide Solution: Mix equal parts of hydrogen peroxide and water, then apply a cloth or brush to the rubber. Let it sit for 10 minutes before rinsing off.
- Baking Soda Paste: Mix baking soda with water to create a paste, then use a cloth or brush to apply it to the stained rubber. Let it sit for 15 minutes before rinsing off.
These methods can help remove discoloration and make your rubber white again, but it’s important to test a small area first and avoid using harsh chemicals that could damage the rubber.
4. What If You Don’t Have Time to Clean Your Shower Head Nozzles Regularly?
If your schedule doesn’t allow for regular cleaning of your shower head nozzles, there are a few things you can do to prevent clogs and maintain their functionality:
- Install a Water Softener: If hard water is the main cause of clogged nozzles in your home, installing a water softener can help reduce mineral build-up and prolong the life of your shower head.
- Use a Filtered Shower Head: A filtered shower head can help remove impurities and minerals from the water, preventing them from clogging the nozzles.
- Make Sure to Wipe Down: After each use, simply wiping down the rubber nozzles with a cloth or sponge can help prevent build-up and keep them functioning properly until you have time for a deeper clean.
While regular cleaning is still recommended, these preventive measures can help reduce the frequency of deep cleanings. By taking care of your shower head rubber nozzles, you can ensure a more enjoyable and efficient shower experience for years to come.
Conclusion
In conclusion, maintaining clean and functional shower head rubber nozzles doesn’t require the use of harsh chemicals or specialized equipment. By incorporating simple household items such as baking soda, vinegar, and even essential oils, you can effectively remove buildup, prevent future clogs, and even add a pleasant aroma to your shower experience.
Remembering to avoid harsh chemicals, abrasive tools, and over-scrubbing will protect the integrity of the rubber, ensuring that your shower continues to provide a strong and soothing flow. Regular maintenance, guided by the manufacturer’s instructions and the tips provided, will extend the life of your shower head and make your daily shower a more enjoyable experience.
Hopefully, this guide has provided you with valuable information and tips on how to clean shower head rubber nozzles. Implementing these practices will not only yield a cleaner, more efficient shower head but also contribute to a more sustainable and health-conscious home environment. Happy cleaning!

