A bidet is a bathroom fixture designed to provide a gentle and thorough cleansing experience using water, offering improved hygiene compared to traditional toilet paper. Once considered a luxury item, bidets are becoming increasingly popular in modern bathrooms due to their convenience, comfort, and emphasis on cleanliness. Beyond their hygienic benefits, bidets also help reduce toilet paper consumption, making them an environmentally friendly choice that can save money over time.
The benefits of installing a bidet include a cleaner, fresher feeling after use, reduced irritation, and a smaller ecological footprint. This article aims to provide an easy-to-follow, step-by-step guide on how to connect bidet to toilet, making the installation process accessible for beginners and DIY enthusiasts alike. With the right tools and guidance, setting up a bidet can transform your bathroom experience in under 30 minutes.
Types of Bidets and Choosing the Right One
Before connecting a bidet to your toilet, it’s important to understand the different types available and select the one that best suits your needs. The main types of bidets include:
- Bidet Attachments – These are mounted under your existing toilet seat and are one of the most affordable and easy-to-install options.
- Handheld Sprayers – Flexible and versatile, these sprayers allow you to control water flow and positioning manually.
- Standalone Bidets – Separate fixtures requiring more bathroom space and plumbing adjustments, often found in traditional setups.
- Electric Bidet Toilet Seats – These replace your existing toilet seat and often come with advanced features like warm water, adjustable pressure, and even air drying.
When choosing a bidet, consider a few key factors. Begin with toilet compatibility, as some models are designed specifically for rounded or elongated toilets. Check the availability of plumbing and electrical access, crucial particularly for electric bidets that require power outlets. Lastly, determine your budget and desired features.
While basic attachments are cost-effective, premium models with adjustable temperature controls and self-cleaning nozzles may offer enhanced comfort and convenience. By understanding the options and evaluating these factors, you can confidently select a bidet tailored to your preferences.

Tools and Materials Needed
When installing a bidet, having the right tools and materials on hand can streamline the process and ensure a proper setup.
Common Tools
- Adjustable wrench or pliers – Useful for tightening connections securely.
- Screwdriver – Necessary if you need to remove the toilet seat or install additional hardware.
- Bucket or towel – Helps catch any residual water when disconnecting hoses.
Materials Provided with Bidet
- T-valve or splitter – Used to redirect water to the bidet.
- Flexible hose – Connects the water supply to the bidet.
- Mounting brackets or clips – Helps secure the bidet in place (varies by model).
Optional
- Plumber’s tape – A helpful material for creating leak-free connections at threading points.
With everything prepared, you’ll have what you need for a smooth and efficient installation.
Preparing for Installation
Turn Off the Water Supply
Locate the shut-off valve, which is typically found near the wall behind the toilet. Turn the valve clockwise until the water supply is fully stopped. Ensuring the water is off will prevent leaks or spills during the installation process.
Flush and Drain the Toilet Tank
Flush the toilet to empty as much water from the tank as possible. This step reduces the amount of water left in the system, making the process cleaner and more manageable. To catch any residual drips, place a towel or small bucket beneath the water connection as an added precaution.
Remove the Toilet Seat (if needed)
Depending on your bidet model, you may need to remove the toilet seat to secure the bidet properly. Using a screwdriver or the appropriate tool, unscrew the mounting bolts at the back of the seat. Carefully lift and set aside the seat to avoid damage, ensuring the area underneath is ready for bidet placement.

By following these preparatory steps, you’ll create a clean and organized work area, making the installation process straightforward and efficient.
How to Connect Bidet to Toilet: Installing the T-Valve and Water Hose
Step-by-Step Guide
- Disconnect the water supply hose from the toilet tank:
Begin by shutting off the water supply at the main valve, usually located near the wall. Flush the toilet to empty the tank as much as possible. Next, use your hands or an adjustable wrench to carefully unscrew the water supply hose from the tank’s fill valve. Be sure to keep a small towel or container nearby to catch any residual water that might spill.
- Attach the T-valve to the tank’s fill valve:
Take the T-valve that came with your bidet kit and screw it onto the tank’s fill valve where you just removed the water supply hose. Hand-tighten the T-valve to ensure a firm connection without over-tightening.
- Reconnect the water supply hose to the bottom of the T-valve:
Reattach the water supply hose to the bottom port of the T-valve. Again, tighten this connection by hand first, and if necessary, use a wrench for a snug fit. Avoid using excessive force to prevent damage to the threads.
- Connect the bidet hose to the side port of the T-valve:
Take the bidet hose provided and attach one end to the side port of the T-valve. Tighten securely using your hands, and use a wrench if needed for a leak-free seal.
Tips
- Always hand-tighten connections first before using a wrench to avoid over-tightening, which can strip the threads or crack components.
- Apply plumber’s tape to the threaded parts of the connections to provide extra leak protection and ensure a secure fit.
- Double-check all connections before turning the water supply back on to ensure they are secure and properly sealed.
By following these steps and tips, you’ll have the T-valve and water hose installed correctly, paving the way for a smooth bidet setup.
Mounting the Bidet and Final Setup
Once the T-valve and water hose are properly installed, the next step is mounting the bidet and completing the setup process.
Attaching the Bidet (For Seat and Attachment Models)
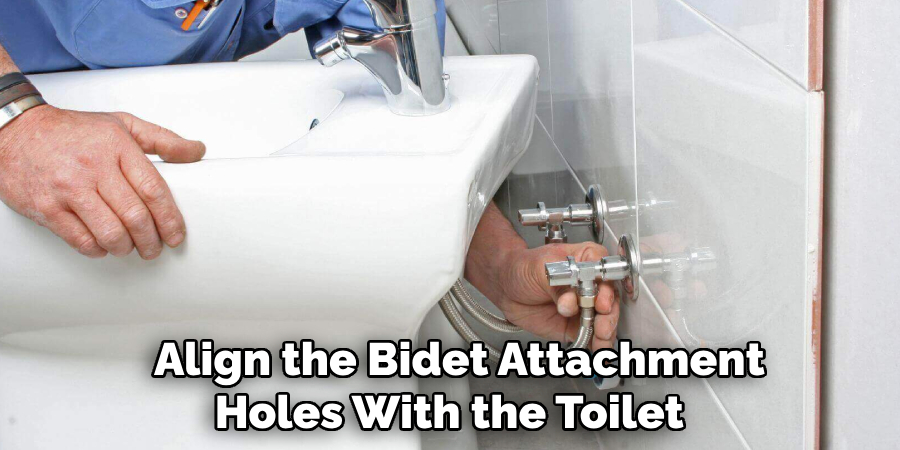
Align the bidet attachment holes with the toilet seat mounting bolts. Carefully position the bidet so that the spray nozzle is properly centered over the toilet bowl. Reinstall the toilet seat over the bidet attachment, ensuring that all components are securely tightened but not overtightened to avoid damage. For handheld sprayers, mount the holder onto your desired location, either onto the wall or the side of the toilet tank, ensuring it’s within easy reach when needed.
Testing the System
With the bidet in place, it’s time to turn the water supply back on. Do this slowly to avoid sudden pressure surges. Carefully check all connection points for any leaks, tightening as necessary. Once you’ve confirmed there are no leaks, test the water pressure and spray direction by activating the bidet. For handheld sprayers, check for smooth operation and adjust the aim as needed.
Adjusting Settings
Experiment with the settings on models equipped with a control dial or remote to find your preferred spray strength and nozzle position. Advanced bidet models may also include temperature controls, allowing you to adjust the water temperature for added comfort. Fine-tune these settings until everything is tailored to your preferences.
Following these steps will complete your bidet installation, and you can enjoy a cleaner, more hygienic bathroom experience!
Troubleshooting and Maintenance Tips
Even with proper installation, occasional issues or the need for maintenance may arise with your bidet. Below are some common problems and maintenance practices to ensure your bidet stays in excellent condition.
Common Problems
- Leaks
If you notice water leaking from connections, check to ensure all fittings are securely tightened. If the issue persists, apply plumber’s tape to the threading before reconnecting to create a more secure seal.
- Weak Spray
A weak spray is often caused by water not being fully turned on or a kink in the hose. Double-check that the water supply is completely open and inspect the hose for any bends or obstructions that may be limiting water flow.
Regular Maintenance
Taking a proactive maintenance approach can significantly extend your bidet’s lifespan and keep it functioning optimally.
- Clean the Nozzles
Regularly clean the nozzles with a soft brush or cloth to remove any mineral buildup or debris that may affect spray performance.
- Wipe Down Surfaces
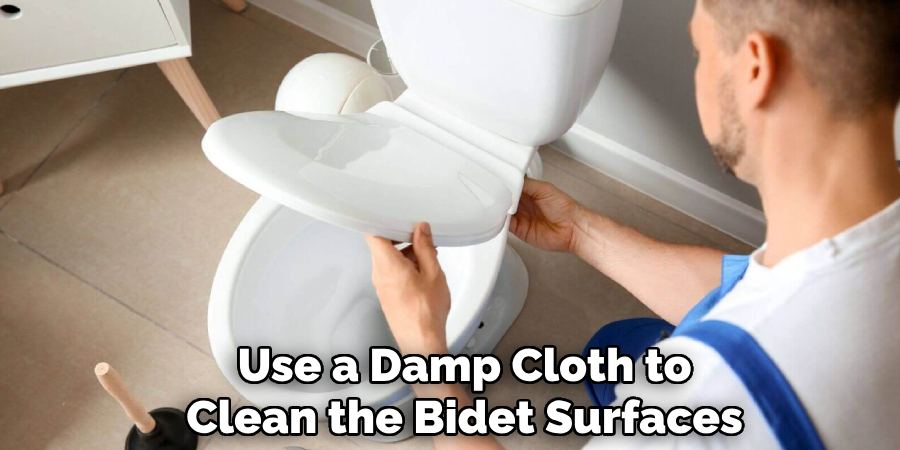
Use a damp cloth to clean the bidet’s surfaces, including the control panel, to prevent grime and maintain a polished appearance.
- Inspect Hoses
Every few months, examine the hoses for signs of wear, cracks, or potential leaks. Replace any damaged parts promptly to avoid more significant issues.
With these troubleshooting tips and maintenance practices, your bidet will remain a reliable and hygienic addition to your bathroom routine.
Conclusion
Installing a bidet is a straightforward process that can be completed in a few simple steps. Begin by turning off the water supply to your toilet, then install the T-valve and attach the bidet hose. Securely mount the bidet to your toilet seat and test for any leaks to ensure proper functionality.
For those wondering how to connect bidet to toilet, rest assured that most installations take under 30 minutes and require only basic tools and minimal plumbing knowledge. Enjoy the enhanced hygiene, comfort, and convenience that your new bidet brings to your bathroom routine.

