Installing a bathroom tap is a practical and rewarding DIY project that can enhance both the functionality and appearance of your bathroom. Whether you’re dealing with an outdated design, a persistent leak, low water pressure, or undertaking a complete remodeling project, knowing how to install a bathroom tap is an essential skill. This task is not as challenging as it might seem, and with the right preparation and tools, you can achieve professional results without hiring a plumber.
The purpose of this article is to guide you through the process, step by step, ensuring a smooth installation. From gathering the necessary tools to removing the old tap and securely installing the new one, we aim to cover every stage with clear instructions. By following this guide, you’ll not only save money but also gain the satisfaction of completing a home improvement project on your own.
Tools and Materials Needed
Before starting your bathroom tap installation, ensure you have all the necessary tools, materials, and safety gear for a smooth process. Here’s what you’ll need:
Tools:
- Adjustable wrench or basin wrench – For loosening and tightening nuts and bolts.
- Plumber’s tape (Teflon tape) – To ensure a watertight seal on threaded connections.
- Bucket and towel – To catch and clean up any water drainage during the process.
- Screwdriver (Phillips and flathead) – For removing screws or securing mounting hardware.
- Silicone sealant (optional) – To provide additional sealing around the base of the tap, if required.
Materials:
- New bathroom tap – Choose a model that fits your sink’s configuration, whether single or double handle.
- Supply lines – Ensure they are the correct length and size, especially if they are not included with your new tap.
- Mounting hardware – These are typically included with the tap, but double-check beforehand.
Safety Gear:
- Gloves – To protect your hands during the installation process.
- Safety glasses – To safeguard your eyes from debris or accidental splashes.
Having these tools and materials ready will streamline the installation, making the process both efficient and hassle-free.
Preparing for Installation
Shutting Off the Water Supply:
Before starting the installation, locate the shut-off valves under the sink and turn them completely off to prevent any water flow. These valves are typically found on the hot and cold water supply lines. Once the valves are shut off, turn on the existing faucet to release any remaining water in the lines. This step ensures the workspace is dry, reducing the risk of water spills during the process.
Clearing the Workspace:
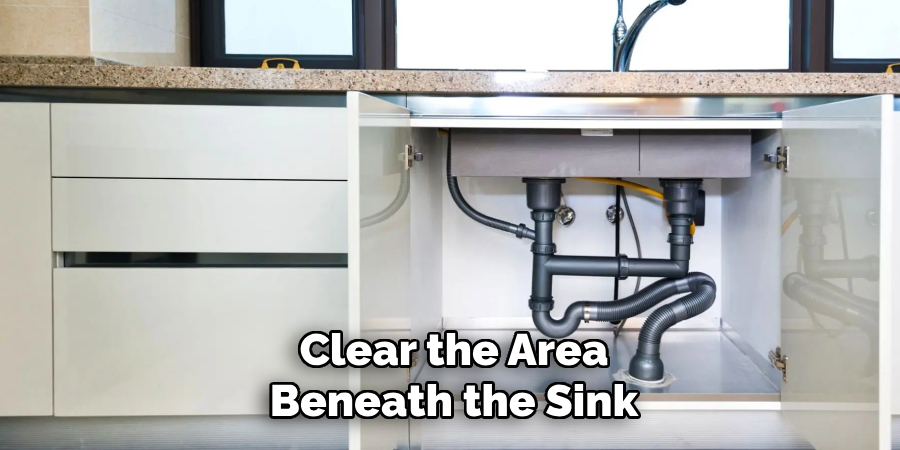
To make the installation process easier and more organized, clear the area beneath the sink of any stored items such as cleaning supplies or toiletries. This will provide better access to the plumbing fixtures. Place a bucket or bowl under the sink to catch any residual water that might escape during the removal of the old faucet. Additionally, keep a towel or rag nearby to deal with any unexpected splashes or drips quickly.
Checking Compatibility:
Before installing the new tap, it’s essential to check the compatibility of the new faucet with your existing plumbing system. This includes ensuring that the new faucet will fit properly in the designated area and that all necessary components, such as connectors and fittings, are included in the package.
How to Install a Bathroom Tap Removing the Old Tap
Step 1: Disconnect Supply Lines
Begin by turning off the water supply to avoid leaks during the removal process. Use an adjustable wrench to unscrew the nuts connecting the hot and cold water supply lines to the old tap. Ensure you hold the lines steady to prevent twisting or damage. Once disconnected, carefully move the supply lines out of the way.
Step 2: Remove Mounting Nuts
Using a basin wrench, locate the mounting nuts securing the old tap underneath the sink. These may be tricky to access due to tight spaces, so patience is key. Turn the wrench counterclockwise to loosen each nut. If the nuts are stuck, applying a lubricant like WD-40 can help loosen them. Keep the removed nuts in a secure place to avoid misplacing them.
Step 3: Lift Off the Old Tap
With the supply lines and mounting nuts removed, gently lift the old tap out of its position from above the sink. Inspect the sink’s surface and clean it thoroughly to remove any old sealant, debris, or grime. This ensures a smooth and secure fit for the new tap during installation. Proper preparation here will help prevent leaks and ensure the new fixture sits flush on the sink.

Installing the New Bathroom Tap
Step 1: Position the New Tap
Begin by carefully inserting the new tap into the designated mounting holes on the sink. Ensure it is aligned properly, with the spout facing the correct direction and the handles, if present, positioned appropriately. Double-check that the tap is centered for both functionality and aesthetic appeal.
Step 2: Secure with Mounting Hardware
From underneath the sink, use the provided washers and nuts to secure the tap in place. Start by hand-tightening the nuts to hold the tap steady, then use a wrench to tighten them further. Make sure to tighten evenly on both sides to prevent any misalignment or uneven pressure, which could lead to leaks or instability. Avoid over-tightening as this might damage the sink or the tap’s components.
Step 3: Apply Silicone (Optional)
For an additional layer of sealing, you may choose to apply a thin bead of silicone sealant around the base of the tap before fully tightening the mounting nuts. This step helps to create a watertight seal and minimizes the chances of water seeping under the tap. Wipe away any excess silicone with a damp cloth or paper towel before it cures. While optional, this step is especially beneficial in areas prone to moisture buildup.
By completing these steps, your new bathroom tap will be securely installed and ready to use!
Connecting Water Supply Lines
Step 1: Attach the Supply Lines
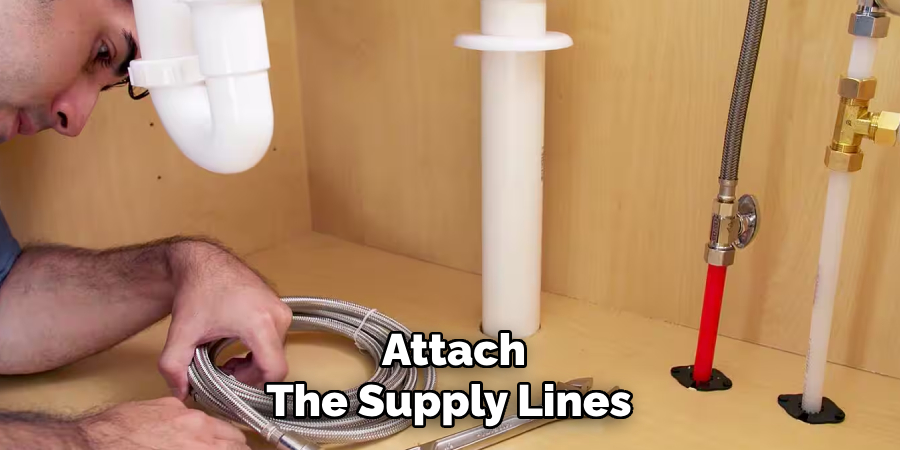
Connect the hot and cold water lines to the corresponding inlets on the tap, ensuring you match each one correctly to avoid mix-ups. To ensure a tight and secure fit, apply plumber’s tape to the threaded connections. This helps create a strong seal and minimizes the risk of leaks.
Step 2: Hand-Tighten, Then Use Wrench
Begin by hand-tightening the connections. This step is crucial to prevent cross-threading, which can damage the fittings and lead to leaks. Once hand-tight, use a wrench to snug the connections. Exercise caution not to overtighten, as excessive force can crack fittings or distort the threads.
Step 3: Check Water Flow
After the supply lines are securely connected, turn on the shut-off valves located beneath the sink. Allow the water to run through the tap and check for any leaks around the connections. This is also an excellent opportunity to flush out any debris that may have accumulated during installation. If leaks are detected, turn off the valves and adjust the connections as needed to resolve the issue.
Troubleshooting and Final Checks
Once the installation is complete, it is essential to perform a thorough troubleshooting process to ensure everything is functioning as it should.
Check for Leaks
Carefully examine all connections, including the supply lines and under the sink, for any signs of drips or water accumulation. Leaks may indicate loose fittings or improper installation. Tighten connections gently if needed, but avoid overtightening as it can damage the components.
Water Pressure Issues
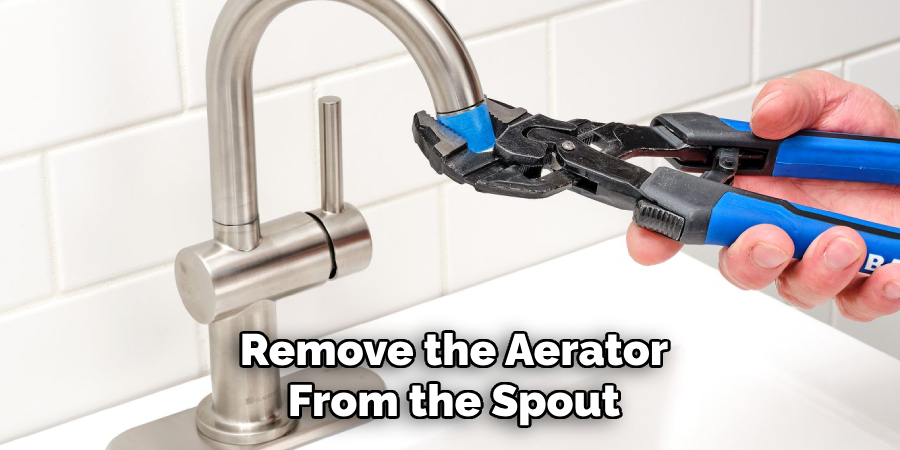
If the water pressure from the faucet is weaker than expected, remove the aerator from the spout and thoroughly flush the system to dislodge any debris or sediment that may be obstructing the flow. Reattach the aerator once the flow is clear and recheck the pressure.
Handle Movement or Wobble
If the faucet handle feels loose or wobbly, inspect the mounting hardware beneath the sink. Tighten the mounting nuts securely to ensure the faucet is stable and properly anchored.
Proper Drain Functionality
If the faucet installation includes a pop-up drain assembly, test its operation by filling the sink with water and engaging the drain mechanism. Ensure it opens and closes smoothly without leaks. Adjust the linkage if necessary for optimal functionality.
By thoroughly addressing these potential issues, you can ensure a successful faucet installation free from complications.
Conclusion
Replacing a bathroom tap doesn’t have to be a daunting task. By following the steps of turning off the water, removing the old tap, installing the new one, and securing all connections, you can achieve a professional result. Remember to take your time with tightening and sealing to ensure a leak-free setup.
With basic tools, patience, and attention to detail, anyone can learn how to install a bathroom tap and give their space a fresh new look. This rewarding DIY project not only saves money but also provides a sense of accomplishment and a functional upgrade to your bathroom.

