A properly functioning toilet is an essential part of any household, ensuring convenience and hygiene in daily life. The internal components, often called the “guts” of the toilet, play a critical role in maintaining smooth operation. Over time, these parts can wear out, leading to common issues such as leaks, weak flushes, or a continuously running toilet, wasting water and driving up utility bills.
Learning how to replace guts in toilet systems is a valuable DIY skill that can save both time and money. This article will guide you through the process step by step, showing how straightforward and cost-effective it is to address these issues with simple tools and a bit of patience. Whether you’re dealing with an immediate problem or looking to extend the lifespan of your toilet, this guide will equip you with the knowledge and confidence to tackle the task.
Understanding the Components of a Toilet
To effectively replace the guts of a toilet, it’s essential to clearly understand the key components inside the tank and their roles. The tank contains several primary parts that work together to ensure proper flushing and refilling.
- Flush Valve: This component releases water from the tank into the bowl during a flush. It is typically connected to the flapper and is crucial in creating a strong and efficient flush.
- Fill Valve: The fill valve controls water flow into the tank after a flush, refilling it to the appropriate level.
- Flapper: The flapper is a rubber or plastic valve that seals the flush valve. When the toilet is flushed, the flapper lifts to allow water to flow out, then reseals to hold water in the tank.
- Float: The float rises with the water level in the tank and signals the fill valve to shut off once the tank is full.
- Overflow Tube: The overflow tube prevents water from spilling out of the tank by redirecting excess water into the bowl.
Common problems include a worn-out flapper, which can cause continuous running water, a faulty fill valve leading to insufficient water levels, or a cracked overflow tube that may result in leaks. Addressing these issues promptly can prevent inefficiencies and significant water waste, making identifying and replacing faulty parts vital when necessary.
Tools and Materials Needed
Having the right tools and materials is essential to repair common toilet issues. Below is a list of necessary items:
Tools:
- Adjustable Wrench: For tightening or loosening bolts and fittings.
- Screwdriver: Useful for removing and securing screws during the repair process.
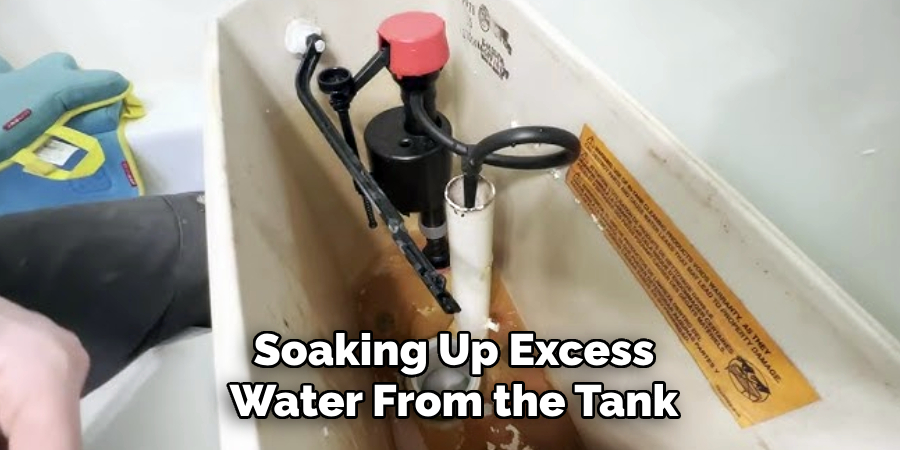
- Sponge: Helps in soaking up excess water from the tank.
- Bucket: A convenient tool for catching water or holding parts during the repair.
Materials:
- Toilet Repair Kit: Includes essential parts like flappers, fill valves, and seals. Make sure to purchase one that is compatible with your toilet model by checking the manufacturer’s specifications.
- Plumber’s Tape: Ensures a watertight seal for threaded connections.
- Replacement Flush Valve: A key component if the existing valve is cracked or malfunctioning.
Selecting a high-quality repair kit that matches your toilet model’s specifications can save time and prevent compatibility issues during the repair process.
Preparing the Toilet for Repair
Turn Off the Water Supply
The first step in preparing for toilet repairs is to turn off the water supply. Locate the water supply valve near the toilet’s base on the wall or floor. Turn the valve clockwise until it stops to completely shut off the water flow. If the valve is difficult to turn, apply gentle pressure with a wrench, but avoid over-tightening to prevent damage.
Drain the Tank
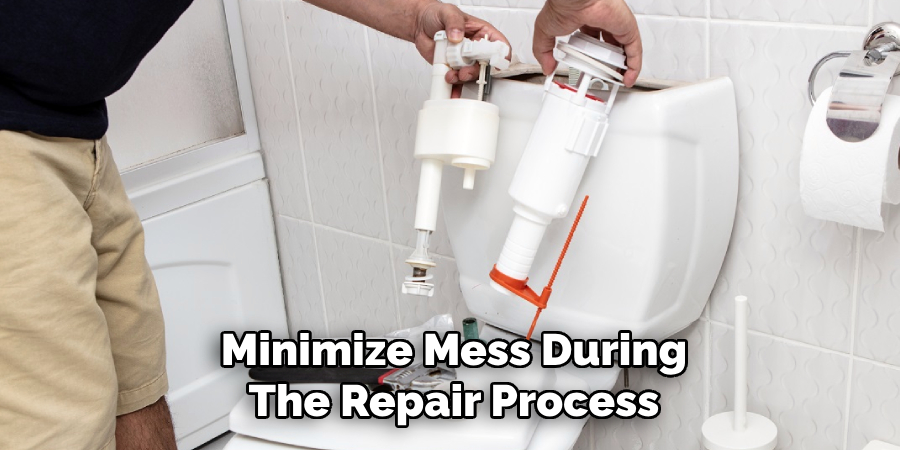
Once the water supply is turned off, flush the toilet to drain as much water as possible from the tank. This step helps to minimize mess during the repair process. After flushing, some water may remain at the bottom of the tank. Use a sponge, towel, or small container to soak up and remove any remaining water. Make sure the tank is empty before proceeding to avoid spills.
Remove the Lid and Inspect the Tank
Carefully lift the tank lid and set it aside safely to avoid cracks or breakage. Once the lid is removed, examine the inside of the tank to identify the components requiring repair or replacement. Common parts to inspect include the flapper, fill valve, flush valve, and seals. Take note of any visible damage, wear, or malfunctioning parts to determine the necessary repairs.
How to Replace Guts in Toilet: Step-by-Step Guide
Remove the Old Components
Begin by shutting off the water supply to the toilet and ensuring the tank is completely drained, as outlined in earlier steps. To remove the old components, disconnect the water supply line from the fill valve, which is typically located on the bottom exterior of the tank. Use an adjustable wrench to carefully loosen the nut that secures the fill valve to the tank. Be cautious not to overtighten or apply excessive force to avoid cracking the tank. Once the nut is removed, gently lift the fill valve out of the tank.
Next, address the flush valve. Inside the tank, locate the large nut holding the flush valve assembly. This is usually situated underneath the tank. Unscrew the nut using a suitable tool, supporting the tank to prevent unnecessary stress or damage. Once the nut is detached, remove the old flush valve assembly. At this point, you should also remove the old flapper and disconnect its chain from the flush lever. Dispose of all old or damaged components properly.
Install the New Fill Valve
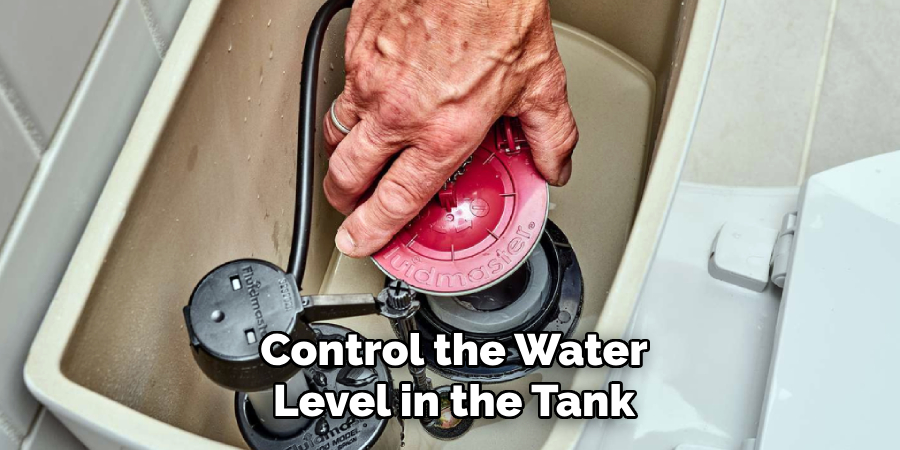
Before installing the new fill valve, adjust the float height according to the manufacturer’s instructions. This will control the water level in the tank once the repair is complete. Place the new fill valve inside the tank, inserting it through the hole at the bottom. Secure the valve by tightening the mounting nut from underneath the tank. Be sure the valve is positioned vertically and snugly, but do not overtighten the nut, as this could damage the tank. Connect the refill tube from the fill valve to the overflow pipe inside the tank.
Replace the Flush Valve and Flapper
To install the new flush valve, position it inside the tank, aligning it with the opening at the bottom. Make sure the rubber or gasket seal is seated correctly to prevent future leaks. Tighten the new nut underneath the tank, ensuring a secure and watertight fit. Next, attach the new flapper to the flush valve by connecting its side arms or with the provided fittings, depending on the design. Connect the flapper chain to the flush lever, leaving a slight slack to ensure smooth operation without excess tension that could cause improper flushing. Adjust the chain length if necessary.
Reconnect the Water Supply
With the new components securely in place, reconnect the water supply line to the bottom of the fill valve. Tighten the connection by hand first, then use a wrench to snug it further, being cautious to avoid overtightening. Turn the water supply back on and allow the tank to fill. Check all connections for leaks and make adjustments as needed. Test the new components by flushing the toilet several times to confirm smooth operation and proper water levels. Make any final adjustments to the fill valve float height or flapper chain if necessary.
Testing the Toilet
Turn the Water Back On
Slowly open the water supply valve by turning it counterclockwise. Allow the tank to refill entirely and listen for any unusual sounds that might indicate an issue. Observe as the tank fills to ensure the water stops at the appropriate level set by the fill valve.
Check for Leaks
Inspect all newly installed components, including the fill valve connection, the flapper, and the water supply line. Use a dry cloth to wipe around these areas and check for any signs of moisture or dripping. If you notice any leakage, carefully tighten the connections with a wrench or make other necessary adjustments.
Perform Test Flushes
Test the toilet by flushing it several times. Observe the flapper’s operation and ensure smooth and thorough flushing without any interruptions. Confirm that the water level is restored accurately and that there are no leaks or malfunctions. Make final adjustments to the flush lever chain or fill valve float height if required.

Tips for Maintaining Toilet Components
Regular Inspections
Regularly inspect your toilet’s components to ensure they are in good working order. Pay close attention to parts like the flapper, fill valve, and the water supply line, as these are prone to wear and tear over time. Early detection of issues can help prevent water waste and potential damage.
Preventative Cleaning
Clean the tank components periodically to remove debris, hard water deposits, or bacterial buildup. Use a non-abrasive cleaner and avoid harsh chemicals that might damage the rubber or plastic parts. Keeping the internal components clean can prolong their lifespan and maintain optimal functionality.
Timely Replacements
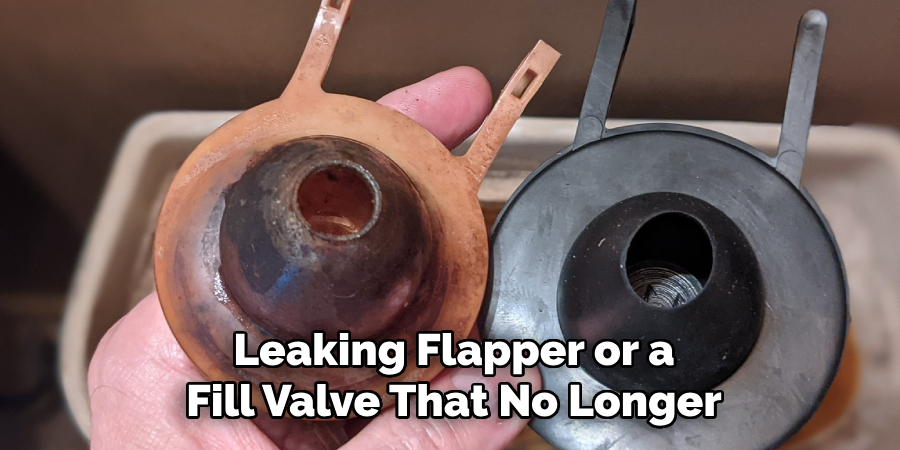
Replace any worn or damaged parts when you notice signs of deterioration, such as a leaking flapper or a fill valve that no longer shuts off completely. Addressing these issues promptly can prevent more significant problems and ensure your toilet continues to operate efficiently.
When to Call a Professional
While regular maintenance can address minor issues, certain situations require the expertise of a professional plumber. Persistent leaks that continue despite replacing components, visible cracks in the tank or bowl, or difficulty accessing internal parts indicate that professional assistance is necessary. Fixing these complex problems without the proper tools or expertise can exacerbate the issue and lead to costly repairs.
Hiring a plumber ensures the job is done correctly, minimizing the risk of damaging the toilet during repair attempts. Plumbers have the necessary training and experience to diagnose and resolve issues efficiently, saving you time, effort, and potential frustration.
Additionally, consulting a professional can be invaluable if you are considering replacing an older toilet with a more water-efficient model. They can provide expert advice on the latest options available and ensure that the installation is performed correctly for optimal performance.
Conclusion
Replacing the internal components of a toilet is a straightforward DIY task when you have the right tools, clear guidance, and patience. Learning how to replace guts in toilet allows you to tackle common issues like leaks or inefficient flushing without the need for costly professional help. Regularly maintaining your toilet components saves water, reduces utility bills, and extends the fixture’s lifespan. At the first sign of trouble, take action and enjoy the satisfaction of resolving the problem yourself. With proper care, this essential household item will remain reliable for years.

