A running toilet cistern is a common and often frustrating household issue. It occurs when water continuously flows from the cistern into the toilet bowl, wasting water over time. This issue can go unnoticed initially, but it quickly leads to higher water bills, unnecessary water wastage, and might be a sign of underlying plumbing problems that require attention. Addressing this problem promptly helps conserve water and prevents potential long-term damage to your plumbing system.
This article is designed to guide you step-by-step on how to stop a toilet cistern from running. From identifying faulty components to executing simple DIY fixes and understanding when to call a professional, these methods aim to help you effectively resolve the issue and restore your toilet’s functionality.
Understanding How a Toilet Cistern Works
To effectively address a running toilet, it’s essential first to understand how a toilet cistern functions. The cistern comprises several basic components that work together to ensure your toilet operates smoothly. These include the fill valve, which controls water entering the tank; the float, which rises with the water level; the flush valve and flapper, which release water into the bowl during a flush; and the overflow tube, which prevents overfilling by diverting excess water.
Basic Components
- Fill Valve: Regulates the flow of water into the tank.
- Float: A buoyant device that rises with the water level and signals the fill valve to stop.
- Flush Valve and Flapper: Work together to release water into the toilet bowl during a flush.
- Overflow Tube: Acts as a safety feature to prevent tank overflow.
What Happens When It’s Working Properly
When functioning correctly, water enters the tank after a flush, causing the float to rise. Once the correct water level is reached, the float signals the fill valve to shut off the water supply, maintaining the desired amount of water in the tank for the next use.
What Goes Wrong in a Running Toilet
A running toilet typically occurs when water continuously leaks from the tank into the bowl. This can be caused by malfunctioning parts, such as a worn-out flapper that doesn’t seal properly, an improperly adjusted float, or a faulty fill valve that fails to shut off the water. Identifying the problematic component is the first step in resolving the issue.
How to Stop a Toilet Cistern From Running: Diagnosing the Problem
Diagnosing the cause of a running toilet starts with a few straightforward tests and inspections.
Visual Inspection
Remove the tank lid and carefully observe the internal components. Check if the flapper is properly seated and free of cracks or wear. Examine the float to ensure it is not stuck or improperly adjusted. Inspect the overflow tube for signs of water exceeding its height, which could indicate a fill valve issue.
Dye Test
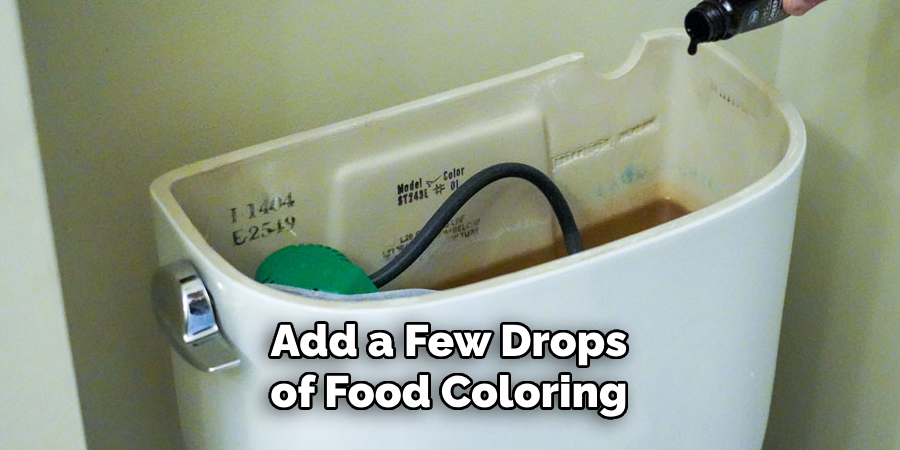
A simple dye test can help identify if the flapper is leaking. Add a few drops of food coloring into the toilet tank and wait for around 15-20 minutes without flushing. If the colored water appears in the bowl, this confirms a leak, usually caused by a faulty flapper or other sealing issues.
Listening Test
Pay attention to any continuous hissing or trickling sounds coming from the toilet. These noises often point to issues with the fill valve or a flapper that is not sealing properly. Identifying these audible clues can save time and help pinpoint the source of the problem.
Using these methods, you can identify the faulty component and take appropriate steps to fix your running toilet.
Fixing a Faulty Flapper
What is a Flapper?
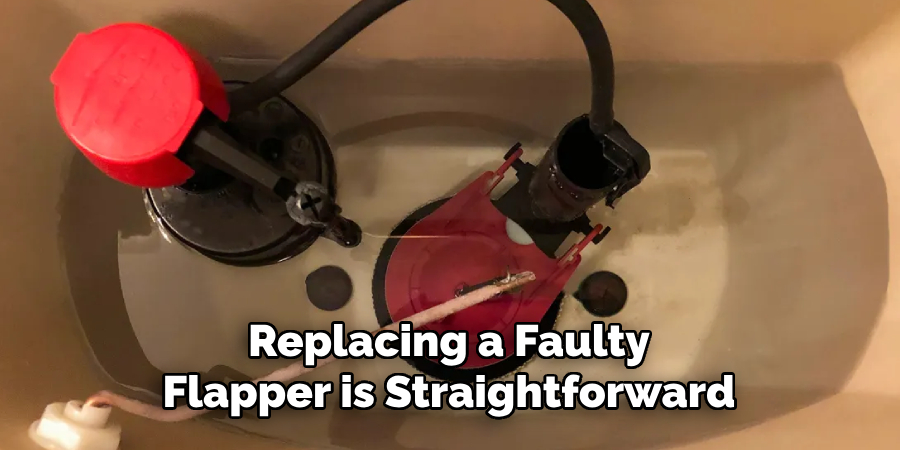
A flapper is a simple yet essential part of your toilet’s mechanism. A rubber seal at the bottom of the tank lifts when you flush, allowing water to flow into the bowl. After flushing, the flapper seals the opening to ensure water stays in the tank until the next use.
Common Issues
Faulty flappers are a frequent cause of running toilets. Over time, the rubber can wear out, leading to improper sealing. Misalignment of the flapper can also prevent it from sealing correctly. Additionally, mineral deposits, often from hard water, may build up on the flapper, impacting its effectiveness.
How to Replace It
Replacing a faulty flapper is straightforward and does not require special tools. Begin by turning off the toilet’s water supply. Next, flush the toilet to empty most of the water from the tank. Remove the old flapper by detaching it from the flush chain and the pegs it is secured to. Take the old flapper to the hardware store to ensure you purchase a matching replacement. Once you have the new flapper, attach it to the chain and secure it to the pegs.
Testing the New Flapper
After installing the new flapper, turn the water supply back on and allow the tank to refill. Once the tank is full, check for any leaks. The replacement is successful if no leaks are present and the toilet flushes properly. This simple repair can save water and prevent further issues.
Adjusting or Replacing the Float
The float inside the toilet tank plays a critical role in controlling the water level. If the float is set too high, water can overflow into the overflow tube, leading to excessive water usage. On the other hand, a float set too low may result in insufficient water in the tank, preventing proper flushing.
Float Too High or Too Low
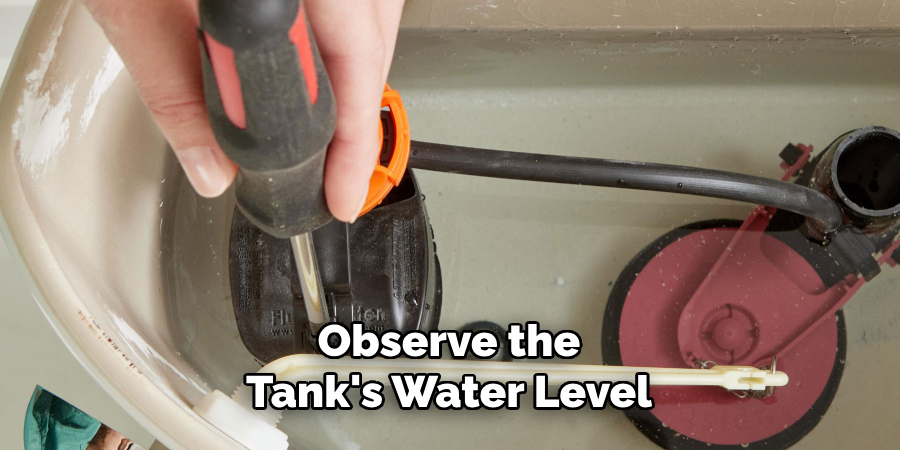
To determine if the float is properly adjusted, observe the tank’s water level. The optimal water level is typically marked on the inside of the tank or should be about an inch below the top of the overflow tube. If the float is misaligned, adjustments may be needed.
How to Adjust
Depending on the type of float mechanism in your toilet, adjustments can typically be made with a screw or clip. For screw-based floats, use a screwdriver to turn the adjustment screw clockwise to lower the water level or counterclockwise to raise it. For clip-based floats, pinch the clip and slide the float up or down on the rod to achieve the desired water level.
Replacing a Broken Float
If the float is cracked or damaged, it must be replaced. Purchase a compatible replacement model from a hardware store. Following the manufacturer’s instructions to install the new float, ensuring it is securely attached and positioned at the correct height. Properly adjusting or replacing the float improves toilet function and conserves water.
Checking and Replacing the Fill Valve
Signs the Fill Valve is Malfunctioning
One of the most common symptoms of a malfunctioning fill valve is continuous water flow into the toilet tank, even after the float has been adjusted to the correct height. This issue can lead to water waste, higher utility bills, and potential overflow problems. Other signs include slow tank refilling, unusual noises coming from the tank, or inconsistent water levels in the bowl.
How to Replace the Fill Valve
Replacing a faulty fill valve is a straightforward process that can be completed with some basic tools. Follow these steps:
- Turn Off the Water Supply
Locate the shut-off valve, usually found beneath the toilet tank, and turn it clockwise to stop the water flow.
- Drain the Tank
Flush the toilet to remove as much water as possible from the tank. Use a sponge or towel to soak up any remaining water.
- Disconnect the Water Line
Unscrew the water supply line from the bottom of the tank. Be prepared for a small amount of residual water to spill out.
- Remove the Old Valve
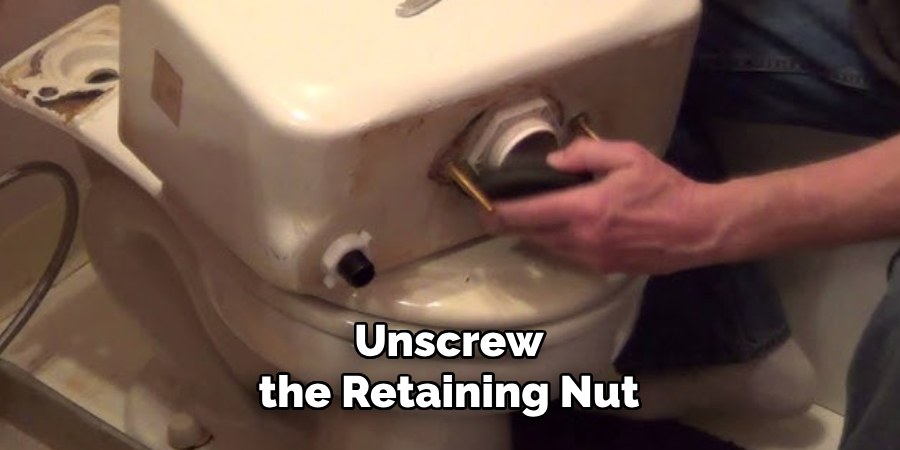
Unscrew the retaining nut that holds the fill valve in place, then lift out the old valve from the tank.
- Install the New Valve
Follow the manufacturer’s instructions to secure the new fill valve in the tank. Make sure it’s properly positioned and fastened with the retaining nut underneath.
- Adjust the Float Height
Follow the valve manufacturer’s guidelines to set the float to the correct water level, which will prevent overfilling.
Flushing and Testing
Turn the water supply back on and allow the tank to refill. Once the water reaches the desired level, check for leaks around the fill valve or connection points. Finally, flush the toilet to ensure proper operation, and verify that the water stops running once the float reaches the correct height. Addressing fill valve issues promptly ensures efficient toilet performance and reduces water waste.
Inspecting the Overflow Tube and Water Level
The overflow tube is a critical component of the toilet tank that prevents overfilling and flooding. It redirects excess water into the bowl, ensuring the tank does not overflow onto the floor. Maintaining the correct water level is essential for the efficient operation of your toilet. Ideally, the water level should be about 1 inch below the top of the overflow tube.
If the water in the tank is too high, it may continuously run into the overflow tube, leading to water waste. To fix this, adjust the float or the fill valve to lower the water level until it reaches the proper height. Ensuring the water level is correctly set not only prevents potential issues like leaks or inefficient flushing but also helps conserve water and maintain the longevity of your toilet system. Regular inspections can help identify and resolve these issues early.
When to Call a Plumber
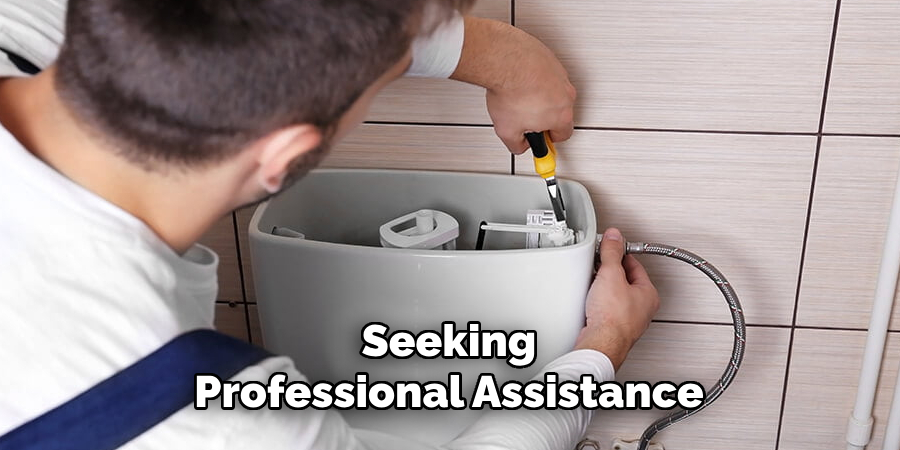
If multiple fixes fail or if the tank parts are outdated or incompatible, it may be time to contact a professional. Persistent leaks despite replacing parts could signal deeper plumbing issues that require specialized expertise. A licensed plumber can accurately diagnose the problem and provide long-term solutions, ensuring the toilet functions efficiently. Additionally, if the entire flushing system is beyond repair, a plumber can guide you through replacing it with a more reliable and modern solution. Seeking professional assistance can save time, avoid water waste, and prevent further complications in your plumbing system.
Conclusion
Learning how to stop a toilet cistern from running involves inspecting key components like the flapper, fill valve, and float. Adjust the float to ensure proper water levels, replace a worn flapper, or install a new fill valve. Fixing a running cistern offers significant benefits, including conserving water, reducing utility bills, and preventing potential plumbing damage. While many issues can be resolved with straightforward DIY fixes, seeking professional assistance is essential if problems persist. By addressing the issue promptly, you can maintain an efficient plumbing system and avoid unnecessary complications in the future.

