Bemis toilet seats are renowned for their exceptional quality, durability, and ease of installation, making them a popular choice for homeowners. Designed to enhance bathroom comfort and functionality, these toilet seats come in various models, including standard and slow-close options, catering to diverse user preferences. However, a common issue faced over time is a loose toilet seat, which can lead to discomfort or instability during use.
Thankfully, addressing this concern is straightforward with proper guidance. This article aims to provide a comprehensive, step-by-step guide on how to tighten a Bemis toilet seat, ensuring a secure and stable fit for long-term performance. Whether you’re working with a standard or slow-close model, this informative guide will equip you with the tools and techniques to tackle the task effectively.

Understanding Bemis Toilet Seat Design
Bemis toilet seats are thoughtfully designed to cater to various user preferences and needs, combining comfort, durability, and functionality. To understand how to tighten your Bemis seat properly, it’s essential to first familiarize yourself with its design features and the factors that can contribute to a loose seat.
Different Types of Bemis Seats
Bemis offers a range of toilet seat options, each with distinct features. Standard models are durable and practical, designed to meet everyday needs. Slow-close seats enhance convenience by preventing slamming and ensuring a quiet close. Easy-clean hinges make removing the seat simple, facilitating hassle-free cleaning. Additionally, the STA-TITE fastening system is a hallmark of Bemis design, providing a more secure fit to reduce shifting or loosening over time.
Fastening Mechanisms
Bemis toilet seats rely on various fastening mechanisms, including plastic or metal bolts. These bolts come in two primary tightening styles—top-tightening bolts, which are secured from above the toilet bowl for easier installation, and bottom-tightening bolts, which require access from beneath the bowl. Both styles ensure a firm connection when properly installed.
Why Seats Loosen Over Time
Over time, Bemis toilet seats can loosen due to a combination of factors. Repeated use naturally wears on the fastening points, while frequent cleaning or the use of abrasive chemicals may gradually affect the bolts and hinges. Additionally, improper installation can result in a less secure fit from the start, leading to instability over time. Understanding these causes can help you prevent and address the issue more effectively.
Tools and Materials You’ll Need
To secure a Bemis toilet seat, you’ll need some essential tools and materials for the job.
Basic Tools
- Flathead screwdriver
- Adjustable wrench or socket wrench
Optional Supplies
- Rubber gloves to keep your hands clean
- A flashlight for better visibility of hard-to-reach areas
- Cleaning wipes to clear debris before installation
- Replacement bolts, in case the existing ones are damaged
When to Use the STA-TITE Tool
If your Bemis toilet seat came equipped with the STA-TITE system, it will include a specialized tightening tool. This tool provides a quick and straightforward solution for securing the seat. Simply follow the instructions provided with the system to achieve a firm, lasting connection effortlessly.
Preparing for the Adjustment
Cleaning the Area
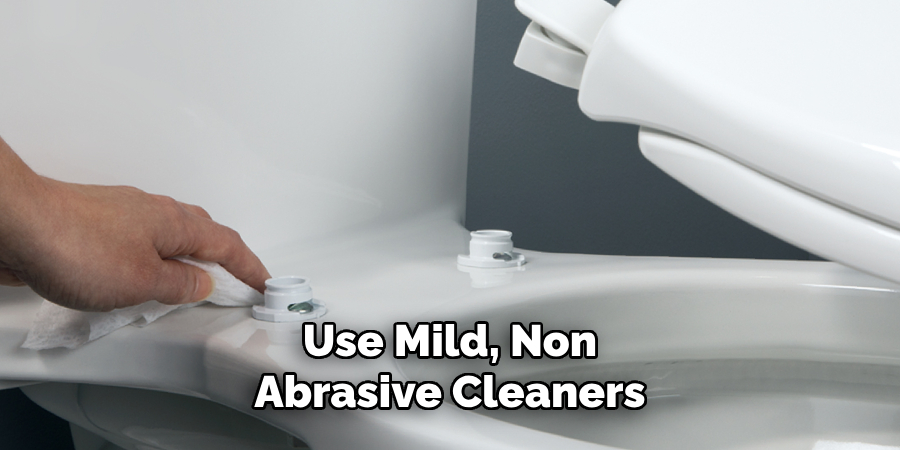
Before making any adjustments to your toilet seat, it’s crucial to clean the area around the hinge caps and bolts thoroughly. Use cleaning wipes or a mild household cleaner to remove any dust, grime, or residue that may have built up over time. Proper cleaning ensures better visibility and prevents debris from interfering with the adjustment. A clean surface also helps provide a secure and stable fit when tightening the bolts.

Inspecting the Hinges and Bolts
Take a moment to inspect the hinges and bolts closely for any signs of wear and tear. Look for cracks, chipped plastic, or broken components that could compromise the toilet seat’s stability. If you notice damaged parts, replacing them before proceeding will ensure long-lasting results and prevent recurring issues.
Removing Decorative Caps
If your toilet seat features decorative hinge caps, they may need to be lifted to access the bolt heads. Gently use your fingers or a small flat-head screwdriver to pry up the caps, not scratching or damaging the surrounding area. Once the bolt heads are exposed, you’ll have clear access to make the necessary adjustments. Replacing the caps after completing the work will help keep the seat looking tidy and functional.
How to Tighten a Bemis Toilet Seat: Tighten a Standard Bemis Toilet Seat
Tightening a Bemis toilet seat is a straightforward task that requires only a few basic steps. Follow these instructions to ensure a secure and stable fit for your seat.
Step-by-Step Instructions
- Locate the Hinge Bolts
Begin by identifying the two hinge bolts securing the toilet bowl seat. Depending on your toilet’s design, these may be situated under the bowl (bottom-mount) or accessible on top of the seat near its hinges.
- Hold the Bolt in Place
For bottom-mount bolts, reach beneath the toilet bowl and securely hold the bolt with your hand or a wrench to prevent it from spinning as you tighten.
- Tighten the Bolts
Using a screwdriver, turn the bolt head clockwise from the top. Continue tightening until the bolt is snug. Be careful not to over-tighten, as this could crack the toilet seat or damage the fittings.

- Reattach Hinge Covers
Once the bolts are secure, snap the hinge covers back into place. Properly reattaching these covers will maintain the aesthetic of your toilet seat and protect the bolts from dirt and wear.
Testing for Stability
After tightening the bolts, test the seat for stability. Gently wiggle it to ensure it no longer shifts or moves. If there is still any movement, revisit the bolts and tighten slightly more as needed.
Following these simple steps, your Bemis toilet seat should remain secure and functional, making your bathroom experience more comfortable and worry-free.
How to Tighten a Bemis Toilet Seat: Tightening a Bemis STA-TITE Toilet Seat
Using the STA-TITE Tool
The STA-TITE system makes installing or tightening your Bemis toilet seat quick and straightforward. Begin by aligning the STA-TITE bolts with the holes on the toilet bowl. Ensure the seat is positioned correctly and centered on the bowl before proceeding. Once aligned, use the STA-TITE tool provided to engage the bolt and start tightening. The tool is specifically designed to simplify the process and ensure accurate installation.
Self-Limiting Torque Feature
One of the key benefits of the STA-TITE system is its self-limiting torque feature. This unique design prevents over-tightening by stopping automatically once the bolt is tight enough. You will notice the tool no longer turns when the correct tension is achieved, ensuring the seat is firmly secured without risking damage to the toilet or the seat hardware.

Rechecking and Adjustments
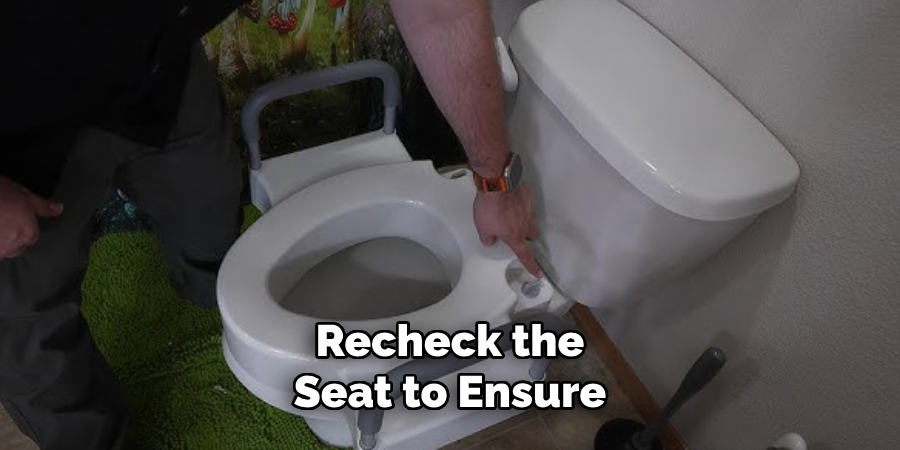
After tightening, recheck the seat to ensure it is centered and stable. Gently move the seat to confirm there is no side-to-side motion or looseness. Make minor adjustments by loosening and re-tightening the STA-TITE bolts until the seat is aligned and secure. With these steps, your Bemis STA-TITE toilet seat will remain snug and reliable for regular use.
Troubleshooting Loose or Damaged Parts
Stripped Bolts or Cracked Hinges
Over time, frequent use and wear can lead to stripped bolts or cracked hinges, making the toilet seat unstable. To identify these issues, inspect the mounting hardware for visible signs of damage, such as worn-out threading on bolts or fractures in the hinge material. If you discover any damage, you must replace the affected parts promptly. Begin by removing the damaged hardware using a wrench or screwdriver, depending on the type of bolt. Ensure the area is clean and free of debris before installing new components.
Replacing Hardware
Bemis offers compatible replacement kits designed explicitly for STA-TITE toilet seats, ensuring a proper fit and durability. These kits are widely available online through the Bemis website or major retailers. They typically include bolts, nuts, and washers necessary for a secure installation. Carefully follow the instructions provided with the kit to replace the hardware efficiently.
When to Replace the Entire Seat
If tightening the hardware does not resolve wobbling or if the damage to the seat or hinges is extensive, it may be time to replace the entire toilet seat. Look for a new Bemis STA-TITE model compatible with your toilet to restore stability and functionality. Regular maintenance can extend the lifespan of your seat and prevent similar issues in the future.
Tips for Long-Term Stability
Regular Checks
Periodically inspect the bolts and hinges of your toilet seat for signs of loosening. Taking a few moments to perform these checks can help address minor issues before they lead to instability.
Avoid Over-Tightening
When tightening the hardware, avoid applying excessive force, as this can damage the porcelain bowl or crack the plastic components of the seat. Tighten until it feels secure but not overly tight.
Cleaning Best Practices
Use mild, non-abrasive cleaners to maintain the toilet seat and the surrounding area. Harsh chemicals or abrasive cleaning tools can degrade plastic fasteners and weaken the hinges over time, reducing their effectiveness. Opt for gentle cleaning methods to preserve the life and functionality of your Bemis STA-TITE toilet seat. Regular care and maintenance will ensure long-term stability and comfort.

Conclusion
Learning how to tighten a Bemis toilet seat is a straightforward process when equipped with the right tools and guidance. By securely fastening the bolts and maintaining routine care, you can prevent frequent loosening and extend the lifespan of your toilet seat. Regular cleaning with gentle methods and periodic checks of fasteners ensure stability and comfort for daily use. Following the provided instructions carefully will help you achieve a safe, stable, and long-lasting toilet seat. With proper maintenance, your Bemis STA-TITE toilet seat will continue delivering reliability and convenience for years to come.

